Table of contents
Introduction
In Octopus, parts are considered consumables or physical items that do not require management in Configurations module.
An example is an incident which requires a keyboard change. An organization may decide that mouses, keyboards, memory sticks and other parts are managed from a separate inventory. In the context of an incident or a SR, one (or more) part can be deducted from the Part Management inventory and added to a request.
To access Part Management, select File > Part Management.


- Access the Part Management module
- Create, modify and delete a part
- Modify quantity in stock
Creation of a part
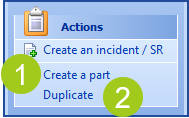
To add a part, use one of the two following actions::
- Create a part
- Duplicate
The Part Creation window opens :
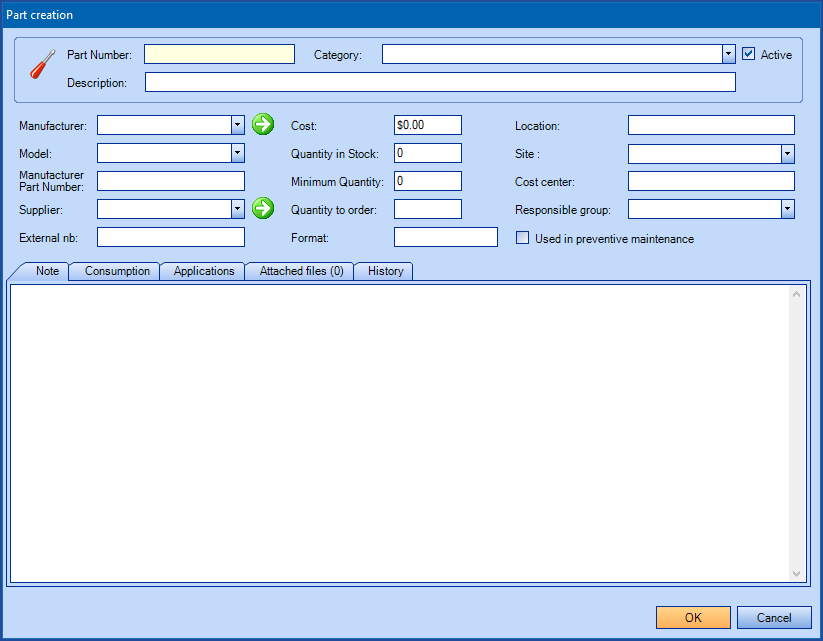
- Part Number
- Unique part identification
- Category
- CPart Category defined by the Octopus Administrator. The option is accessible from Tools > Reference Data Management... > Parts > Categories menu
- Description
- Part name or description
- Manufacturer
- Part manufacturer. This information is related to Supplier Module
- Model
- Part model. It is always related to a manufacturer
- Manufacturer Part Number
- Manufacturer part number. When a part number is specified, Manufacturer field is required, because it is the manufacturer part number
- Supplier
- Part supplier. It is the supplier selling the part. This information is related to Supplier Module.
- External nb
- Number identifying the part from an external part system
- Cost
- Unit cost of the part
- Quantity in Stock
- Actual quantity in stock
- Minimum Quantity
- Minimum quantity to keep in stock
- Quantity to order
- Quantity to order
- Format
- Unit format of the part, such as box, pack of 10, etc.
- Site
- Indicate the site of the part
- Location
- Indicate where the part is physically located
- Cost center
- Cost center of the part
- Responsible group
- Octopus user group responsible for managing this type of part
- Used in preventive maintenance
- Indicates that the part is used for preventive maintenance
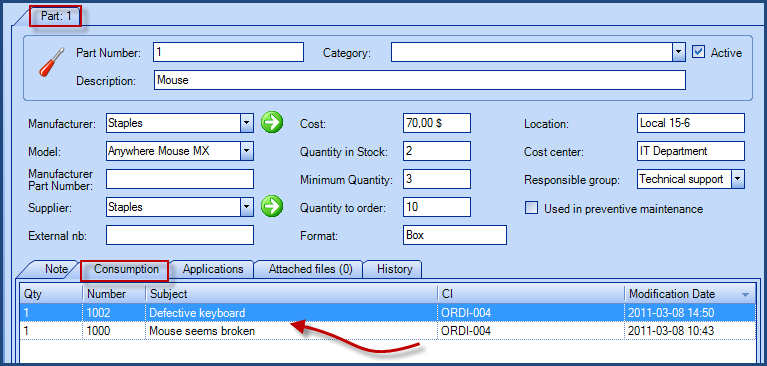
Consumption Tab
Look at the Consumption tab of a part to see the incidents or SR that have been related to this part.
Applications Tab
The Applications tab allows to specify to which CI type, manufacturer and model a part is associated. Hence, when selecting a part within a request, the system will consider the CI in cause (or related) and present only the parts associated to this CI.
To associate a CI type (or more) to a part:
- Click the + button
- Select the CI type to associate to the part
- Select the manufacturer
- Select the model
- Click OK

Allocate a part to an incident or a service request
It is possible to add internal and external parts to an incident or a service request by clicking on the Parts link below the Activities area. The cost of the part will be added to the Total Cost of the request.

Internal Parts
Parts belonging to the internal inventory and counted in the Octopus Part Management.
Add an internal part
Parts link opens the Add parts window. You must then :
- Click on the Add button in the Internal Parts area
- Put the cursor on the Part no. cell
- Press F3 or double-click to access the Search for a part window
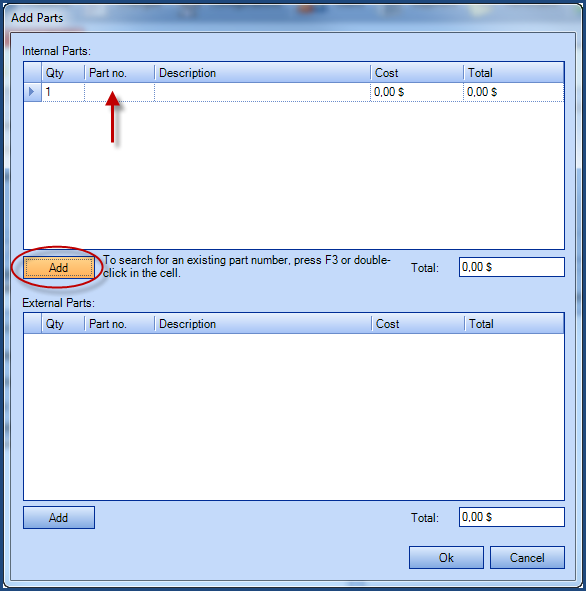
- When the part is added, you can modify the quantity
- If necessary, you can add other parts
- Click Ok when finished
Search
It is possible to search for parts by using the set of different part fields in the Advanced tab of the Search window.
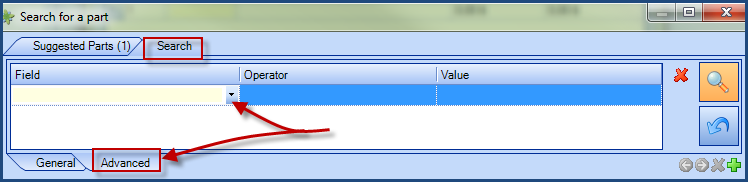
Suggested Parts
When searching for a part, if no application has been specified in the part record, the system will display all the inventory active parts. When relating a CI type in the part record, the search gets "filtered"; the system considers the CI type of the request and only displays parts associated with this CI type.

Modify quantity in stock
As parts are allocated to requests, the inventory quantity decreases. To modify the quantity of internal parts in inventory, you must :
- Search for the part from Part Management module
- Access the part record
- Modify Quantity in stock value by adding the amount purchased to the actual number
What you need to know:
To modify the quantity in stock, the Octopus user must have with the following permission:
- Modify quantity in Stock
External parts
Parts that have been purchased or used when needed and that is not managed in Octopus Part Management module (for example, a part provided by an external supplier).
Add an external part
Parts link opens the Add parts window. You must then :
- Cliquer sur le bouton Ajouter de la section Pièces externes
- You must specify :
- Quantity
- Part Number
- Description
- Cost

- If necessary, you can add other parts
- Click OK when finished
From Web Tech
It is possible to add a part to a request from Web Tech. The Parts field is located at the bottom of the page under the Group and Assignee fields.

Once in the parts window you can:
- A; Add a search criteria to look for a part in inventory
- B; Add a unmanaged internal part
- C; Add an external part
Once you have found the part, add the quantity and click on OK to add it to the request. Note that you can add more then one part to a request. If a cost was associated to the part, it will be added to the request and to the ownership cost of the CI if one was added to the request.


CI Cost
When a CI is related to a request, and that request needs parts, cost of those parts will be added to the CI cost maintenance.
For more information, please see CI Cost Management article.
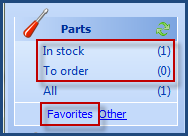
Lists
Three lists are available in Part Management.
- In Stock
- Displays the list of parts actually in stock
- To order
- Displays the list of parts whose quantity in stock is lower than the minimum amount
- Inactives
- Displays the list of inactive parts (that will no longer be considered in the parts inventory)

Incident/SR parts display
When creating a list displaying incidents/SRs, you can choose to add a column allowing you to view certain information about the parts.
Two types of column exist:
- Parts (@Request.Incident.UsedPartDescriptions)
- Qty [Number] Description; Qty [Number] Description (internal and/or external parts), etc.
- Parts (detailed) (@Request.Incident.UsedPartDetailedDescriptions)
- Qty [Number] Description Total cost; Qty [Number] Description Total cost; etc.; Grand total (all parts)
Importing Parts
To import parts, please visit page DataImporter - Import Parts.
Thank you, your message has been sent.