Table of contents
Related articles
Introduction
When Octopus is used according to ITIL® concepts, several links can exist between the different types of requests. In addition, it becomes important to qualify these links find out more about the kind of relationship applied.
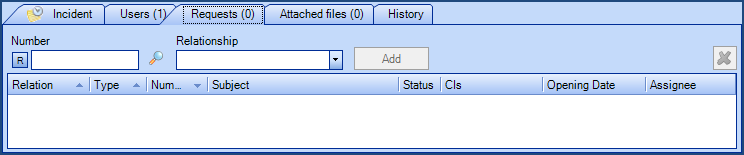
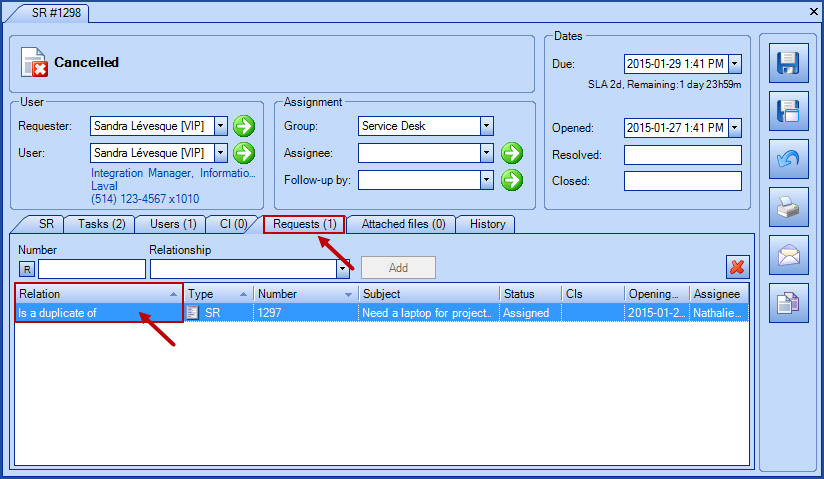
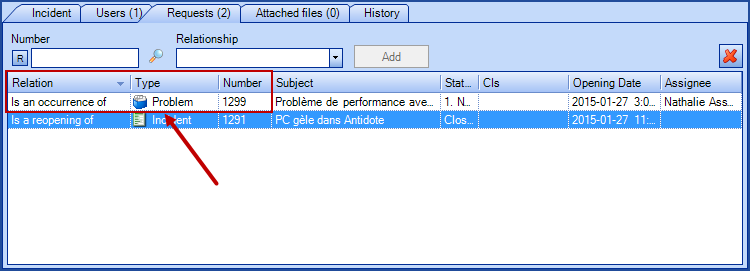
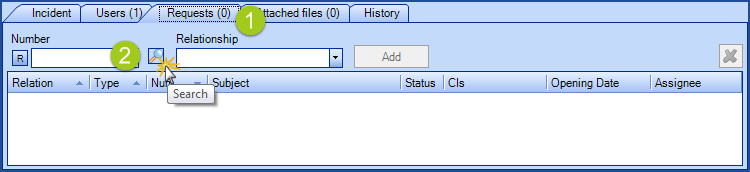
Request relationships are visible in the Requests tab.
Evolution of Relationship Types
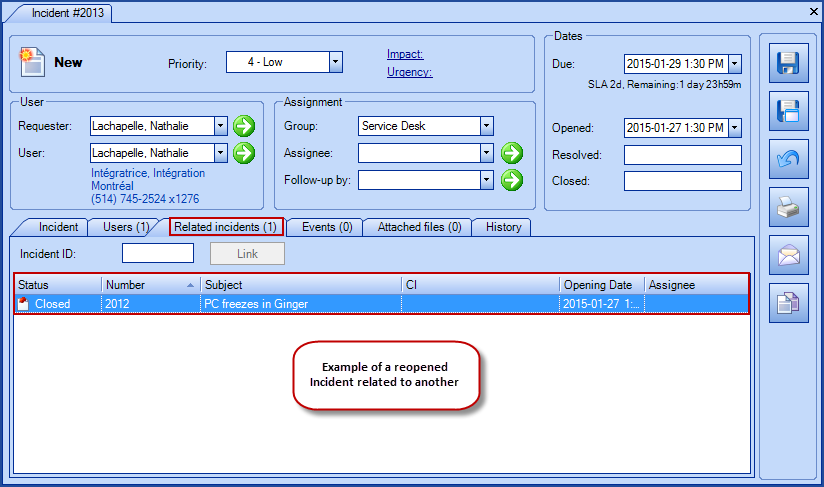
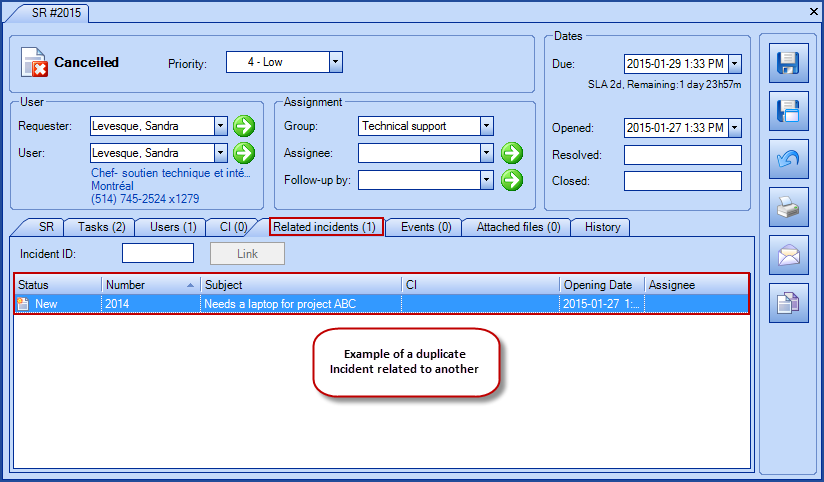
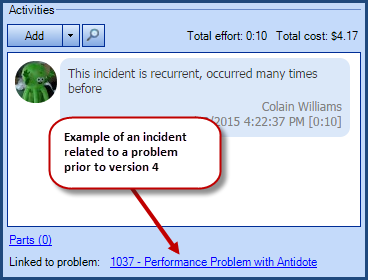
In the past, relationships between incident, SR or problem records were possible in Octopus, but the relation could not be qualified. For example, the Related Incidents tab showed linked incidents/SR, but the relation type was not identified. The relation between an incident and a problem was visible from the Incident tab, below the activity log area. Problems were the only type of request that could be linked to a change, but the method was not intuitive.
Starting with version 4, the relationships between any type of request are consolidated in the Requests tab, and the relation type can be qualified. For example, we can link an incident to a change, and indicate the relationship this way: change #4567 is the solution for incident #1234.
Request Relationships from version 4 and on

Types of relationship
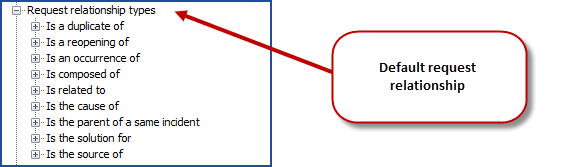
Here is the list of relationship types preconfigured in Octopus, you can find them in Reference data management:
Advantages of using the relationships
In IT, access to the right information at the right moment is very important. We know that the work of the various IT groups is interconnected, and the information in Octopus provides Octopus users with a better overview during the request lifecycle or useful data when it is time to analyze completed requests. The use of relationships is an asset.
With request relationships, you can rapidly display duplicate requests, reopenings, evaluate the impact of a general issue from the parent request, the number of recurring situations that could be resolved permanently by Problem Management. And to measure the success of your changes, you can see the incidents caused by a change.
Request relationships become a complementary method to measure the effectiveness of IT services and to identify elements that need work in a continuous improvement mode.
Configuration of Request Relationships
Octopus version 4 comes with preconfigured request relationships that are ready to use. It is possible to access, modify, add or delete relationship types in the Reference data management. Only the Octopus system relationship types cannot be modified or deleted (this point is covered later in this document).
- Administer Octopus
Request relationships are managed from Tools > Reference data management... > General > Request relationship types.
Here is the list of the preconfigured relationships:
| Description | Opposite Description | Is a system relationship* |
|---|---|---|
| Depends on | Has for dependent | Yes |
| Is composed of | Is part of | No |
| Is the cause of | Has for cause | No |
| Is the solution for | Has for solution | No |
| Is the source of | Has for source | Yes |
| Is the parent of a same incident | Is the child of a same incident | Yes |
| Is related to | Is related to | No |
| Is a duplicate of | Has a duplicate of | Yes |
| Is an occurrence of | Has for occurrence | Yes |
| Is a reopening of | Has been reopened | Yes |
System relationships cannot be deleted because they are used in business rules by Octopus. Also, a cardinality of one to one or one to many has been applied to these relation types, meaning that:
- A source request with a relationship defined with a cardinality of one to one can only be linked to one request
- A source request with a relationship defined with a cardinality of one to many can be linked to more than one request
This prevents establishing relationships that would not make sense; for example, a child incident related to many parent incidents.
Recommendation
We based the preconfigured relationships on ITIL® principles. If you want to add or modify relationship types, we recommend that you take the time to analyze the different situations to apply relationships to ensure they make sense.
Relationship Configuration
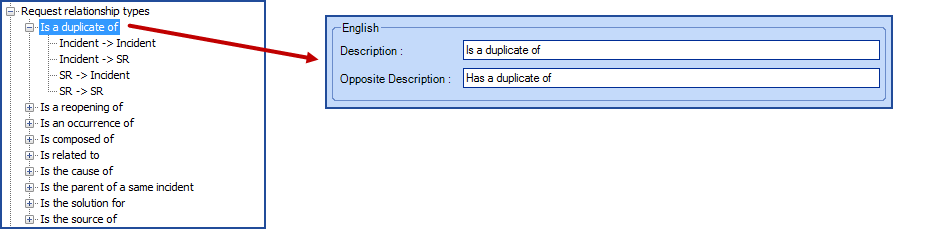
Relationship definition contain the relationship description and the opposite one.
By example :
Under it is configured the behavior of the relationship.
- Request 1 is the source request and Request 2 is the destination request
- Define the cardinality between Request 1 and Request 2
- Define the cardinality between Request 2 and Request 1
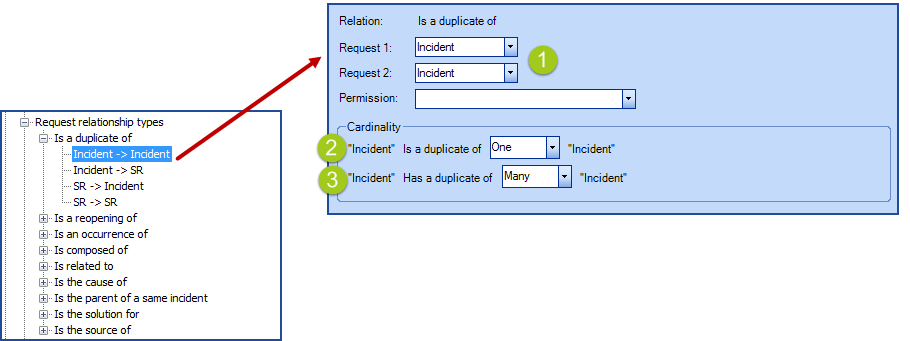
Possible cardinality types are:
- one to one
- one to many
It is possible to change the relationship names as well as their behavior. You can also right click and use Add or Delete. System relationships cannot be deleted, because Octopus bases some business rules on them.
Add a permission to a request relationship
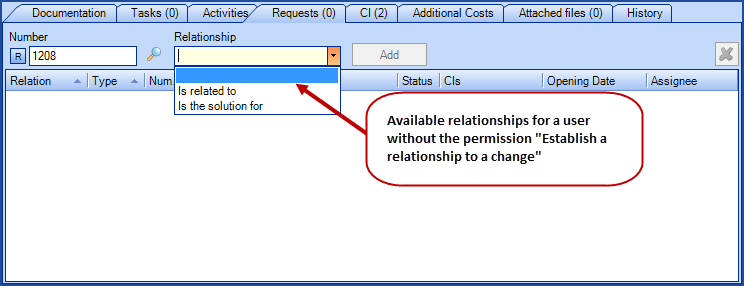
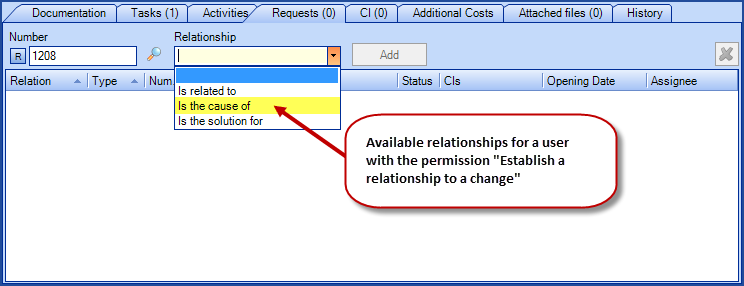
When managing the various request types, it is possible that you will prefer to control who is allowed to establish specific relationships. You can create custom permissions to control who has the right to add relationships. If someone has not the required permission, he will not see the relationship type in the list of the available relationships, or a error message will appear if he tries to delete the relationship.
To find out how to create this type of permission, see the Customizing the required permissions to add or remove a relationship section in the Role Management wiki.
Using Request Relationships
What you need to know:
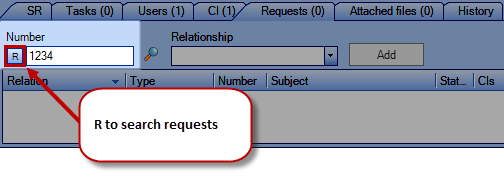
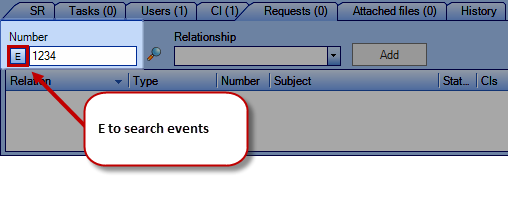
It is possible to link event requests. However, as event the sequence of record numbers can be the same as the one for incidents/SR, we have placed this request type in a separate search.
By default, the  button indicates that the search is performed on all requests that could be related, except events. Click the or the
  to Search a request or Search an event.
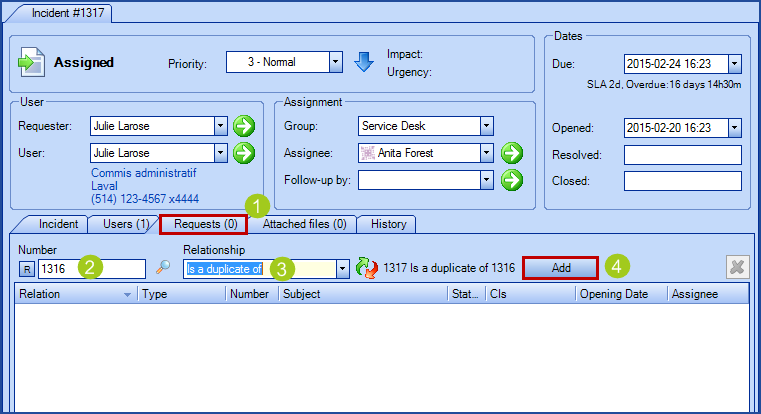
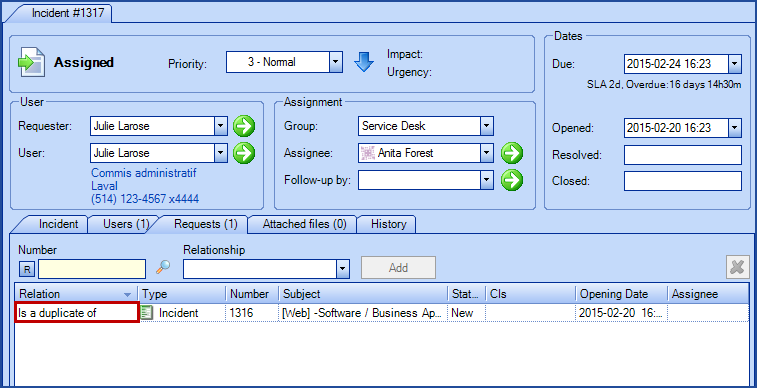
How to add a relationship to a request
To add a relationship to a request, you have to:
- Select the Requests tab
- Enter a request number to be linked
- Select the relationship type
- Octopus only displays the available relationship types according to your permissions (to learn more about permissions,see the previous section)
- Octopus displays the direction of the source request to the destination request; you can reverse the direction by clicking the
 icon
icon - Click the Add button

How to add a relationship to multiple request at once
There are two methods to add relationships to requests.
With the fist one, you can:
- Select the Requests tab
- Enter request numbers by using a coma to separate them
- Select the relationship type
- Octopus only displays available relationship types according to your permissions
- Octopus displays the direction of the source request to the destination request; you can reverse the direction by clicking the icon
- Click the Add button


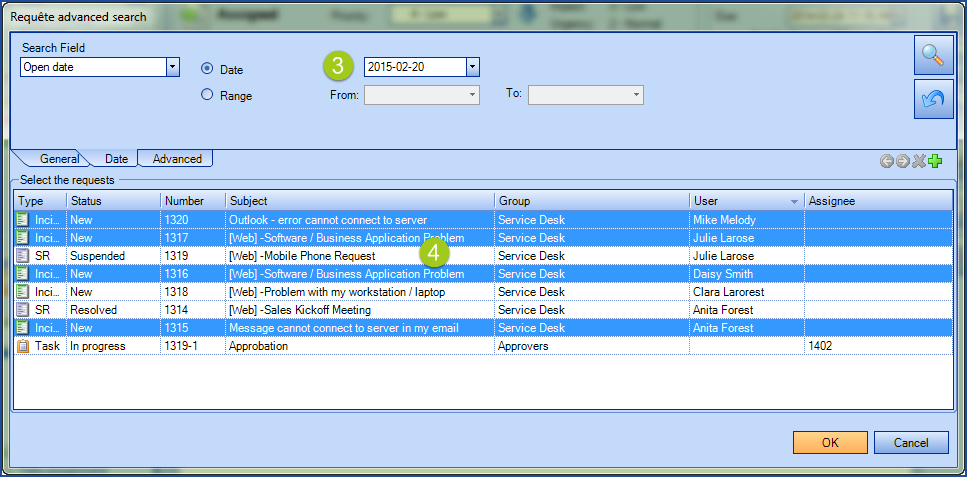
For the second method, you can:
- Select the Requests tab
- Use the magnifier to access the advanced requests search

- Enter search criteria and search, then select the requests to be related. You can use the SHIFT and CTRL keys to select multiple requests
- Select the relationship type
- Octopus only displays available relationship types according to your permissions
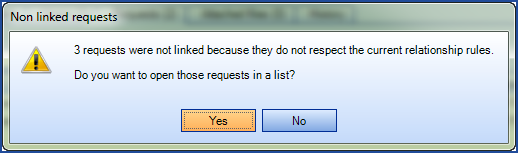
- Octopus will attempt to relate all the selected requests. If one request or more cannot be related for any specific business reason, a message will display saying so and offering to bring up the problematic requests
- Octopus displays the direction of the source request to the destination request; you can reverse the direction by clicking the icon
- Click the Add button
Remove a request relationship
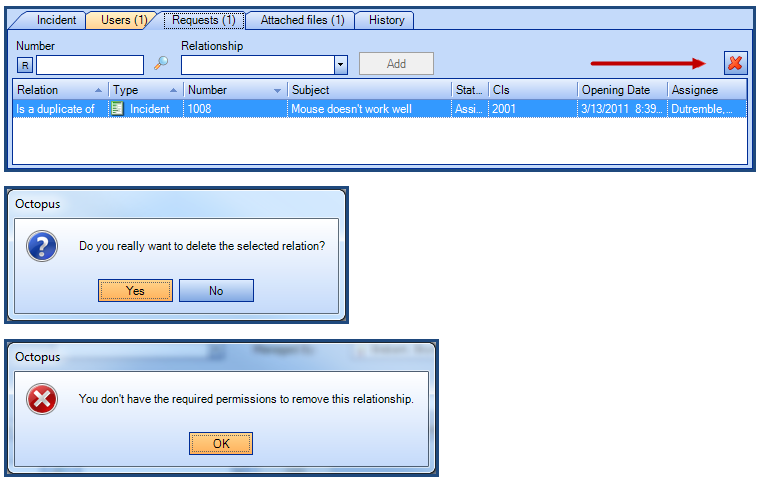
To remove a relationship, you have to:
- Select Requests tab
- Select the relationship to remove
- Please note that this action does not delete the destination request, it only removes the relationship
- Use the
 to the right or hit the Delete key
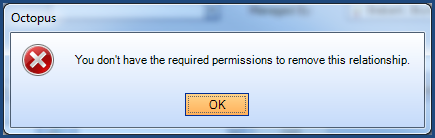
- If you do not have the permission to remove this relationship type, Octopus will display an error message (see previous section to learn more about permissions)
- Confirm with button Yes to the question Do you really want to delete the selected relation?
Parent-child incident behavior
In IT parent-child relationships are used during a failure or problem affecting many users with a common cause. One incident, usually the first case that came in, gets designated as the parent and the others are related to the first, as children.
The case then gets processed within the parent incident that gets escalated, if required, to specialized support groups for quick resolution. The fact of identifying child incidents allows to see a link to the parent when you open them in order to access the most up to date information.
This prevents the various support groups from researching or troubleshooting separately, which would dilute the efforts, to concentrate it all on the one parent incident.
When linking a parent incident to one or more child incidents, the parent's classification information is automatically assigned to the child requests.
The copied fields are:
- Priority
- Impact
- Urgency
- Category / Subcategory
- Service
- CI in cause
- If the parent incident already has a CI in cause, adding a parent-child relationship will cause the child CI to inherit the CI of the parent.
- If the parent CI is added or modified after adding the parent-child relationship, the child CI will be modified only at the resolution of the parent.
- In the context where you would like the child incident to keep its CI in cause, an option is available. Its name is Incident.ChildRequestPreserveCI.
See the Octopus Options on Demand article for more information.
Here are some aspects that identifies that an incident is part of a parent-child relationship:
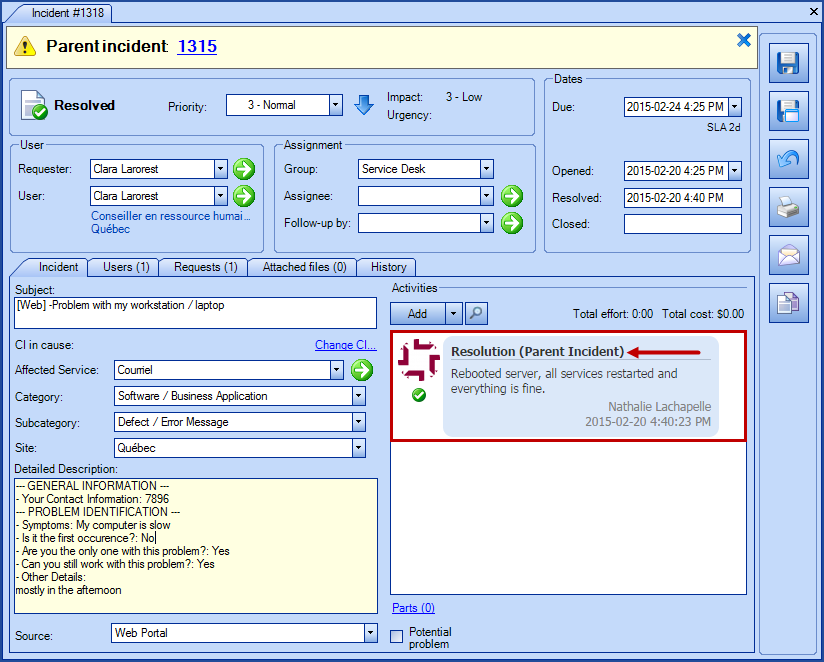
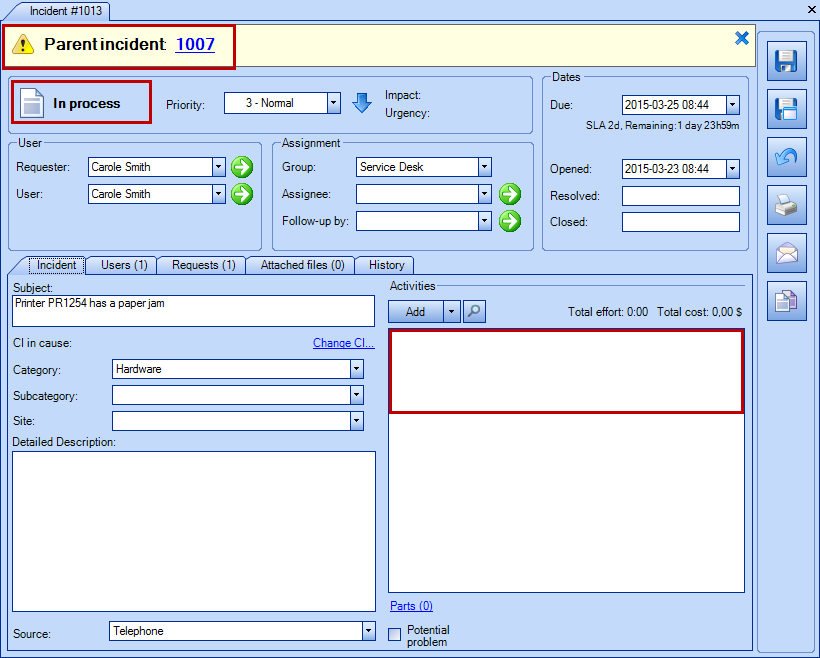
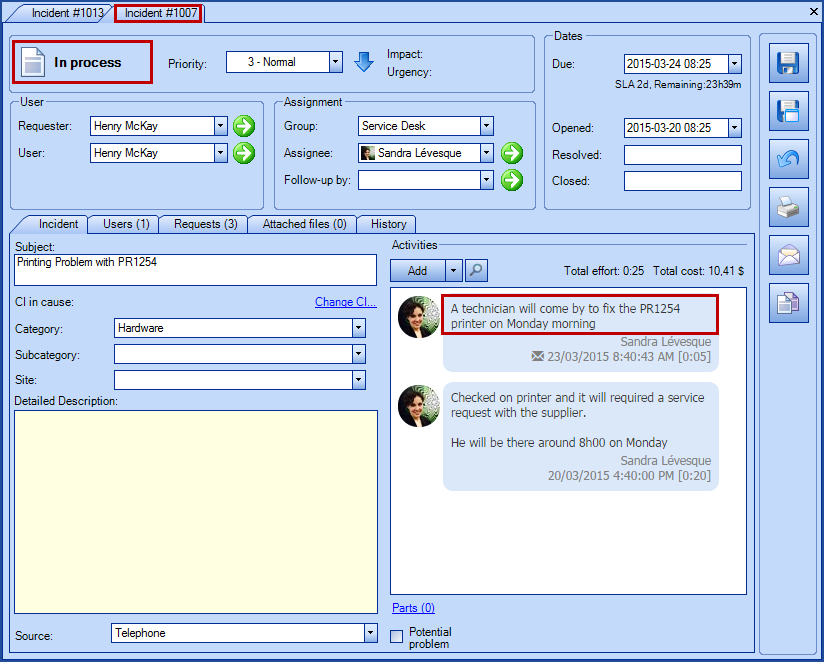
- When an incident is related as a child, you can see the relationship in the Request tab and a banner appears at the top of the screen with the parent number in hyperlink.
-
Note that from this moment on the status and the information relevant to the problem at hand should be documented in the parent request
-
-
From the moment where an incident is related as a child to a parent incident, the status of the parent will be synchronized to the child.
-
This helps with maintaining the SLA, as if the parent is suspended the children will be too.
-
The exception to the rule is if a child is suspended directly. This will break the link to the parent's status until the incident is reactivated and the parent status changes or is resolved.
-
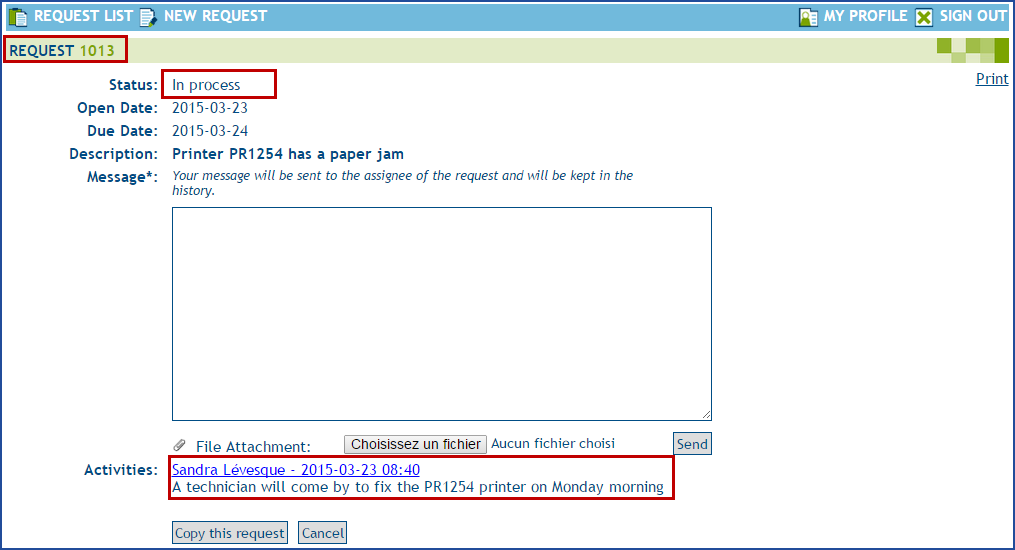
- From the Web Portal of the children request.
- The parent status will be reflected.
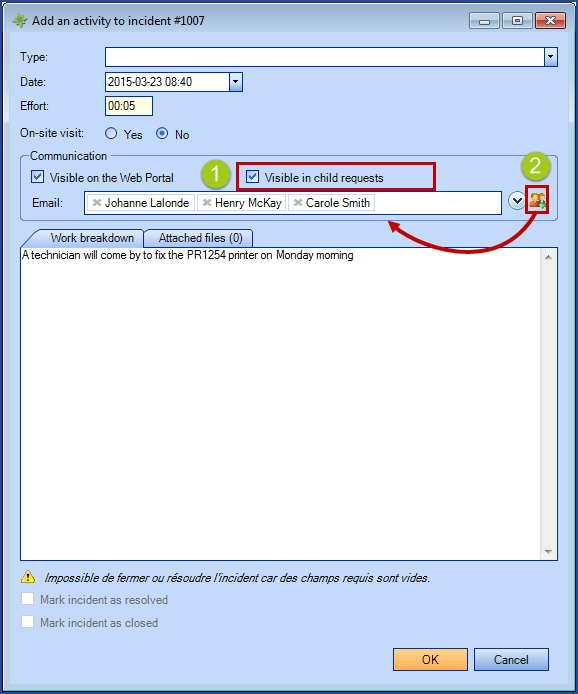
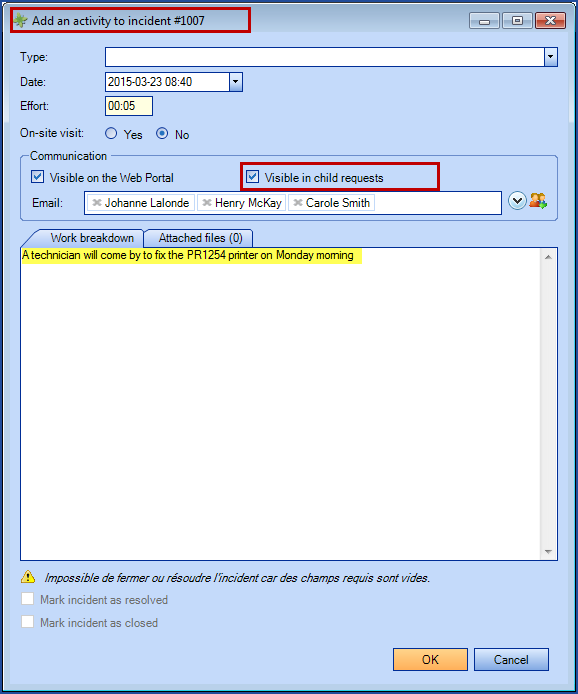
- Activities checked Visible in child requests will be visible (bur they will not be visible in the children in Octopus)
- From the parent request.
- The Visible in child requests checkbox will be available, which will add the activity to all child requests.
- An email can be sent to both parent and child requests by using the email button.
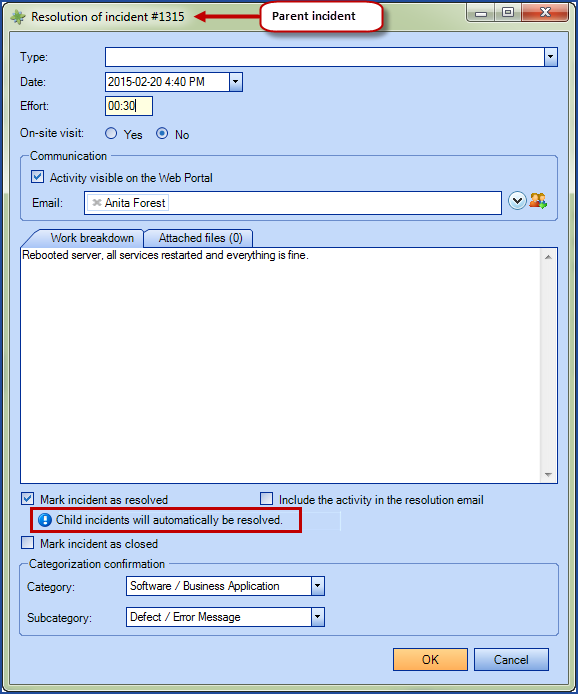
- Upon resolution of the parent, a message indicates that Child incidents will automatically be resolved
- The child incidents will have the resolution activity of the parent with the Resolution (Parent Incident) activity type

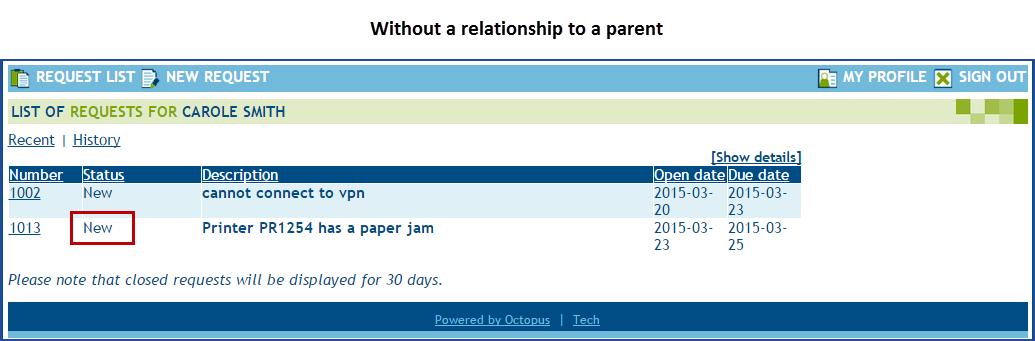
How children requests work from the Web Portal
Users may not be aware that a parent-child relationship exists between requests. To them, they have relayed a problem and they only want to know that someone is taking care of it, and that is how it should be.
From the moment a child request is related to a parent, a link to the parent will be visible in Octopus from the top left corner of the screen. The evolution of the request will be followed in the parent request from there.
To prevent multiple data entry in requests and to concentrate all efforts on resolving the issue at hand, the parent request has additional options and the status of the parent will be reflected in the child. We say reflected because the real status of the child will not be changed. The same goes for activities checked Visible in child requests that will be visible in the Web, but will not be copied in the child request.

Behavior of dependent requests
Dependent requests are meant to specify when a request needs to be completed before another can be taken charge of.
Setting a dependency will mark as pending the dependent request until all dependencies are resolved. The Dependencies not completed pending reason will be used.
A request can have multiple dependencies. You could build a chain of dependency as long as required
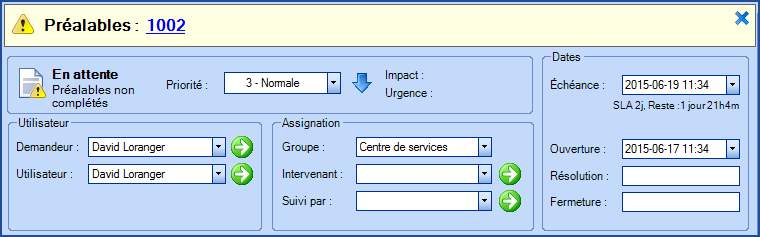
When opening a request with unresolved dependency, a yellow notification will appear, showing the list of dependent requests.
Some columns are available to ease management of different requests:
-
Has dependent allows to identify all requests for which another request depends on
-
Dependencies lists all dependent requests, and allows to easily open them
Behavior of copied requests on the Web Portal
When a user copies a request on the Web Portal, the two requests will automatically be linked to ease followup.
Thank you, your message has been sent.