Table of contents
Introduction
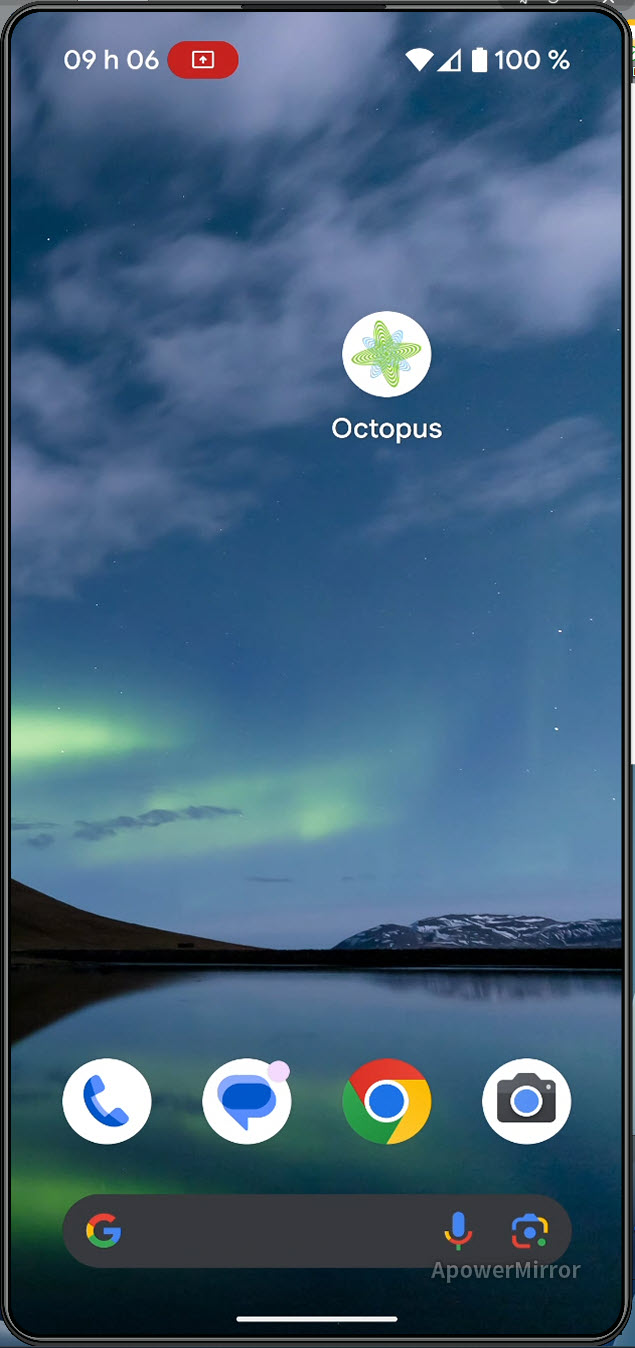
Welcome to the Wiki page of the Octopus Mobile.
This app is designed to work with smartphones.
 Warning:
 Installing the Application and Connecting to Octopus Mobile
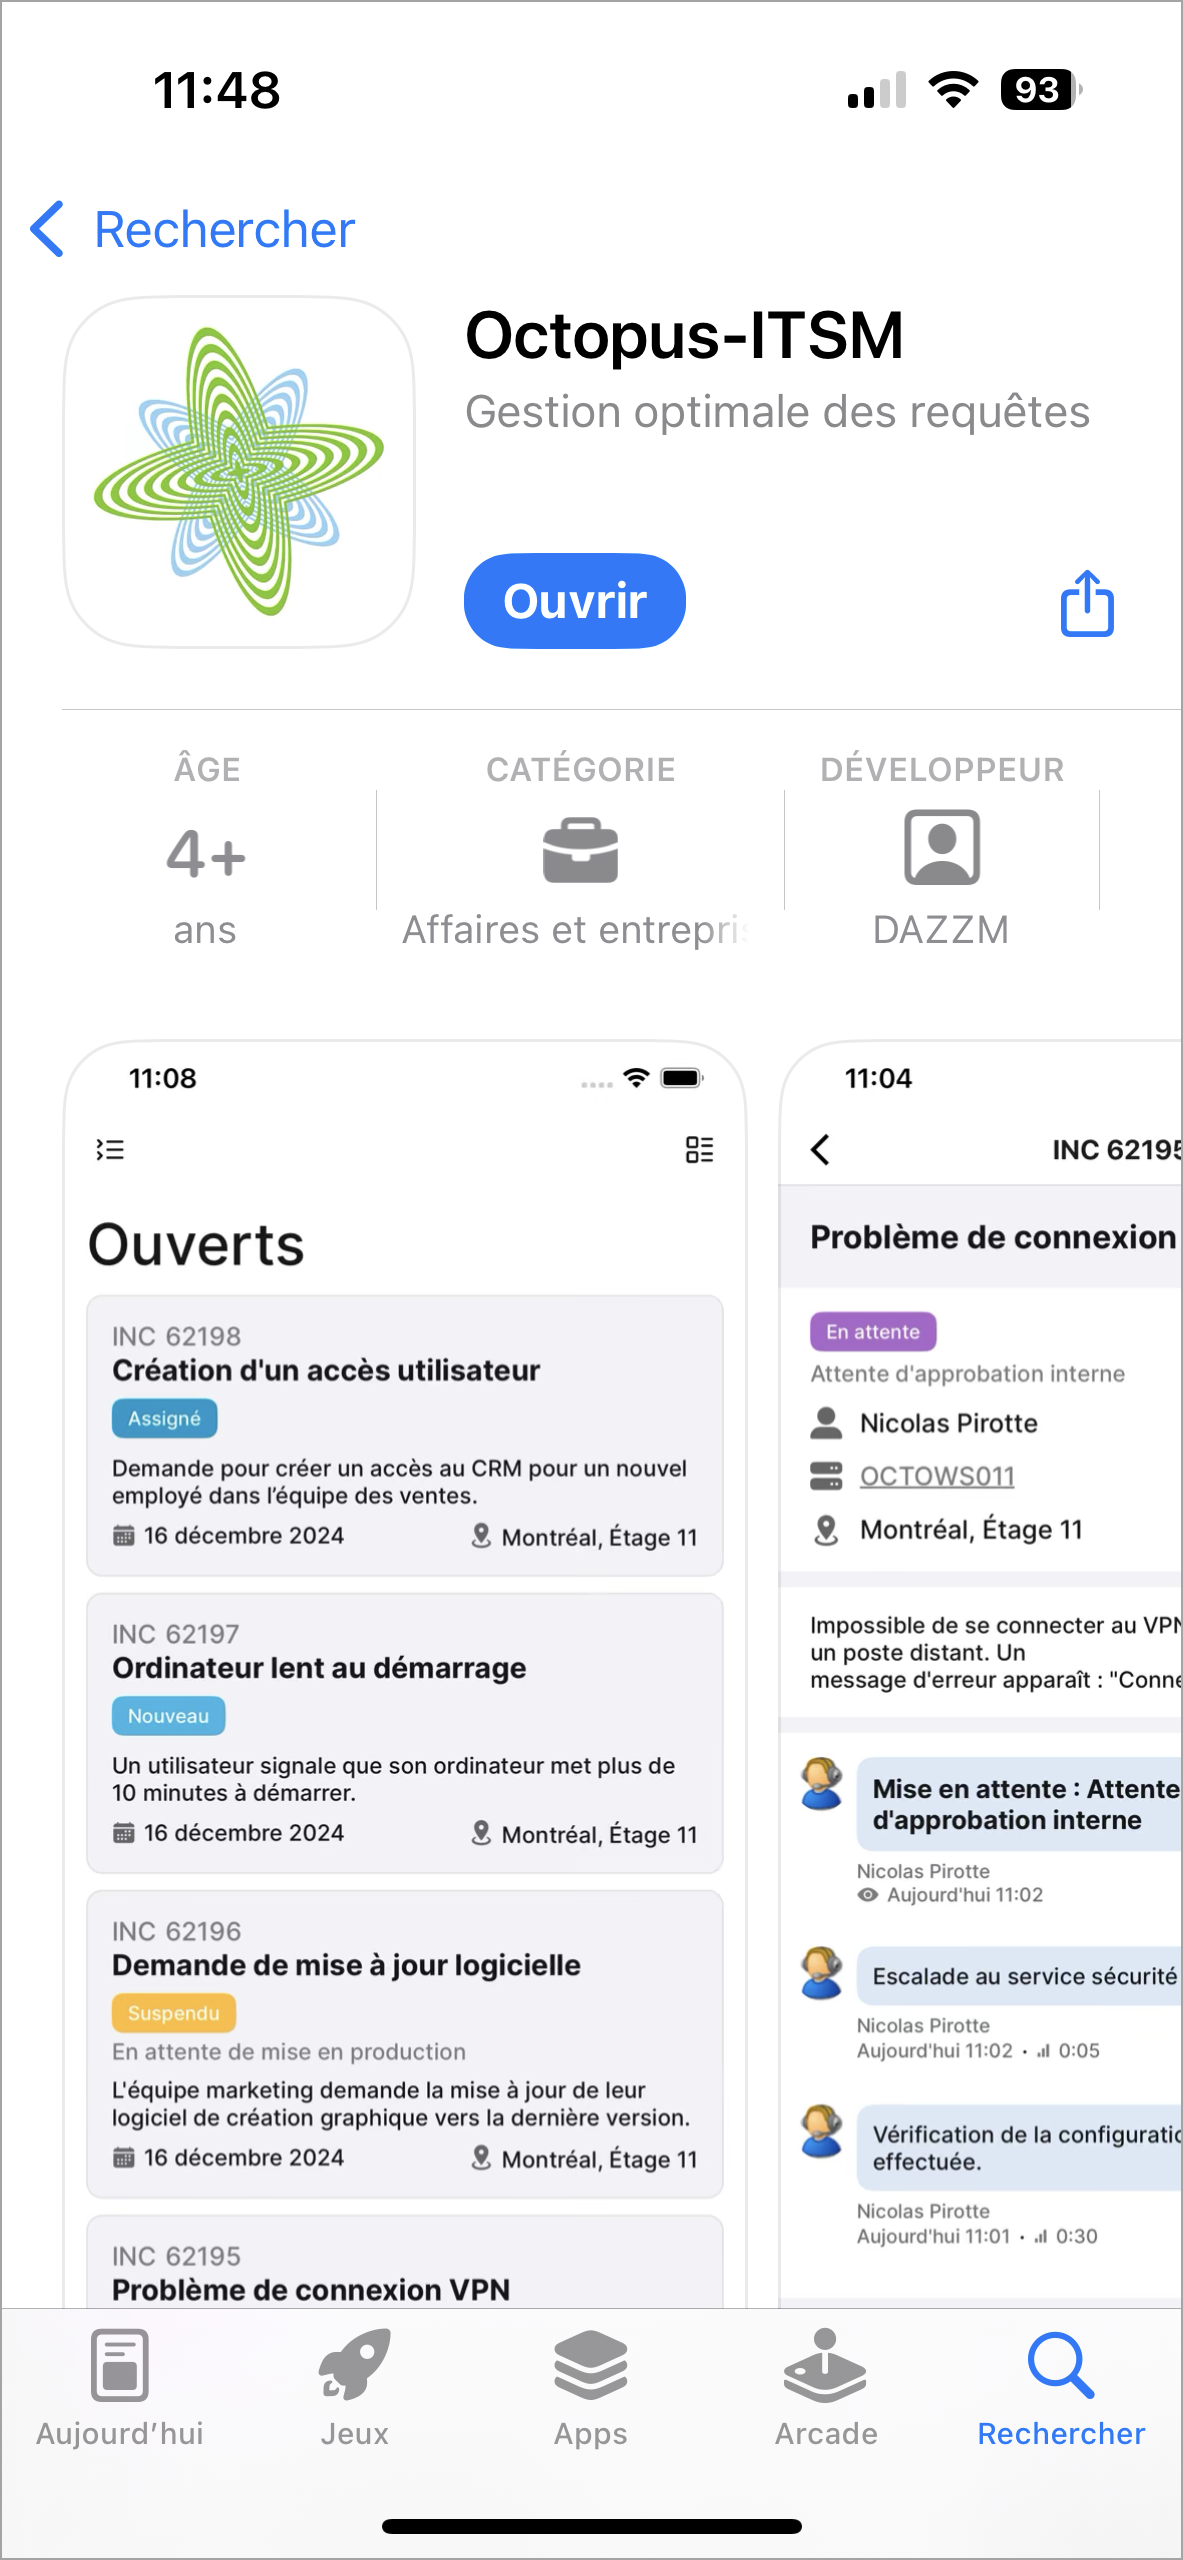
iPhone
Install the Octopus-ITSM application from the App Store.

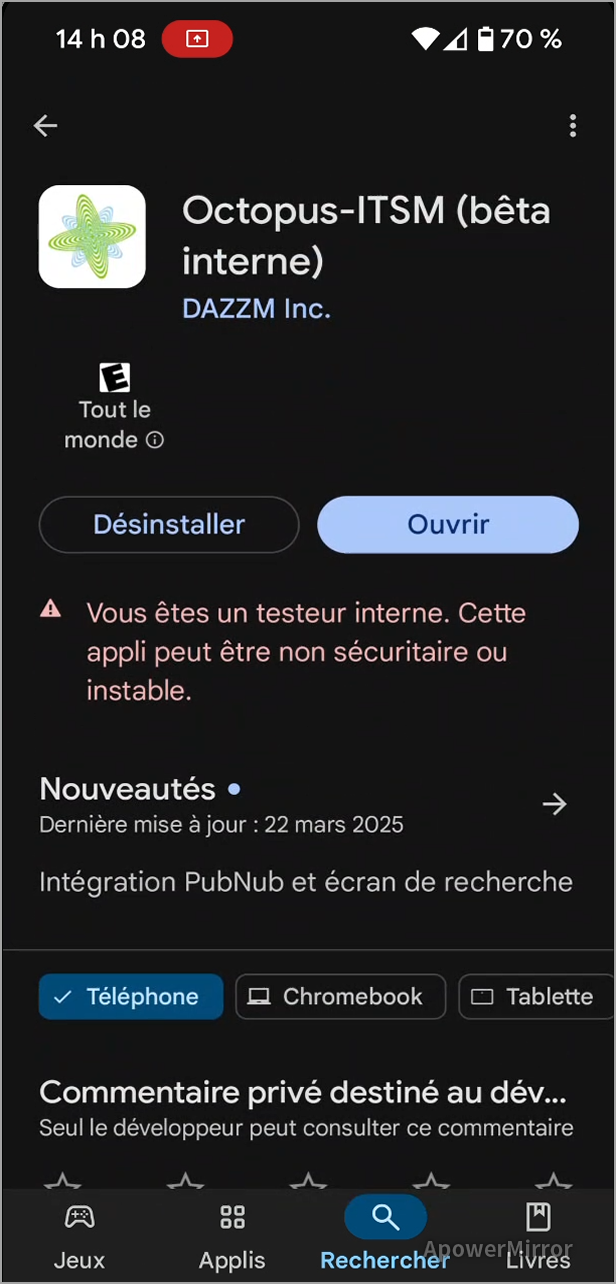
Android
Install the Octopus-ITSM application from Play Store.

Connecting to Octopus Mobile
Once the app installed, two authentication methods are available.
1- Authentication with a QR Code
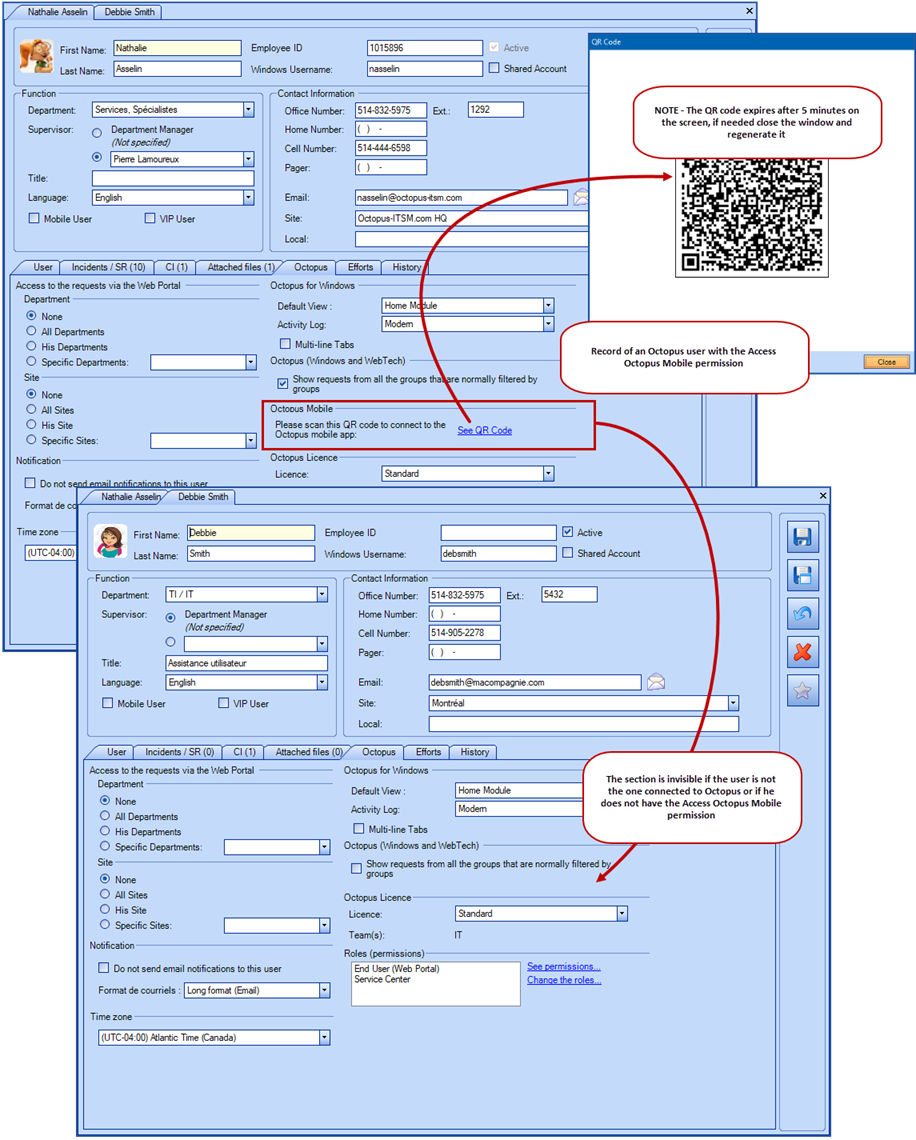
open the Octopus Mobile and scan the QR code from the Octopus user's record.
- In Octopus go to File > Modify my profile.
- Click the Octopus tab
- Click the See QR Code link. You must be in the record of the user who is logged in, otherwise the section is not visible.
- Scan the QR Code and the Mobile will open with the credentials of this user.
-
Note - The code expires after 5 minutes on the screen.
-
-
The application displays the New list by default.
The Access Octopus Mobile permission is required to use the Octopus app.
2- Authentication via email
To do so, simply select the Connect by email option. Users will need to provide the following information:
- Site name
- The site name can be found in the URL displayed in the window accessible via Tools | Display installation kit address, which is "https://[Site name].OCTOPUS-ITSM.COM/Start". Spread the word to mobile app users.
- Email address
An email will then be sent to the user with a link to directly access the mobile app. The link will be valid for 15 minutes. If you can’t find the email in your inbox, check your spam folder.
The user will then be authenticated for the team for email connection configured in their user profile. By default, the team for email connection is set to the one currently used by the user. If necessary, you can change the default team for email connection.
What you need to know:
The See QR code link will be clickable for an Octopus user under the following conditions:
1 ) The Octopus user must be connected to Octopus with his username and his password. A QR code cannot be generated from the account of another.
2 ) The Octopus user minimally needs the following permission:
- Access Octopus Mobile
- Access to Octopus
- Access the user management module
- Modify his profile
Then the See QR code should be available. Of course, once connected, the Octopus user needs to be provided with the proper permissions to do his work.
Connection Problem
If you get an error message when connecting to the application with your QR code, you need to make sure you're not using your company's wifi on your cell phone and try again.
If this works, you need to authorize the following domain for the application to work with your wifi: https://octopus-itsm.skyjs.io/
Main Page
The main page displays the list of New requests by default.
From the main page, you can:
- View the details of a request in the New list by clicking on the request card.
Visual Explanation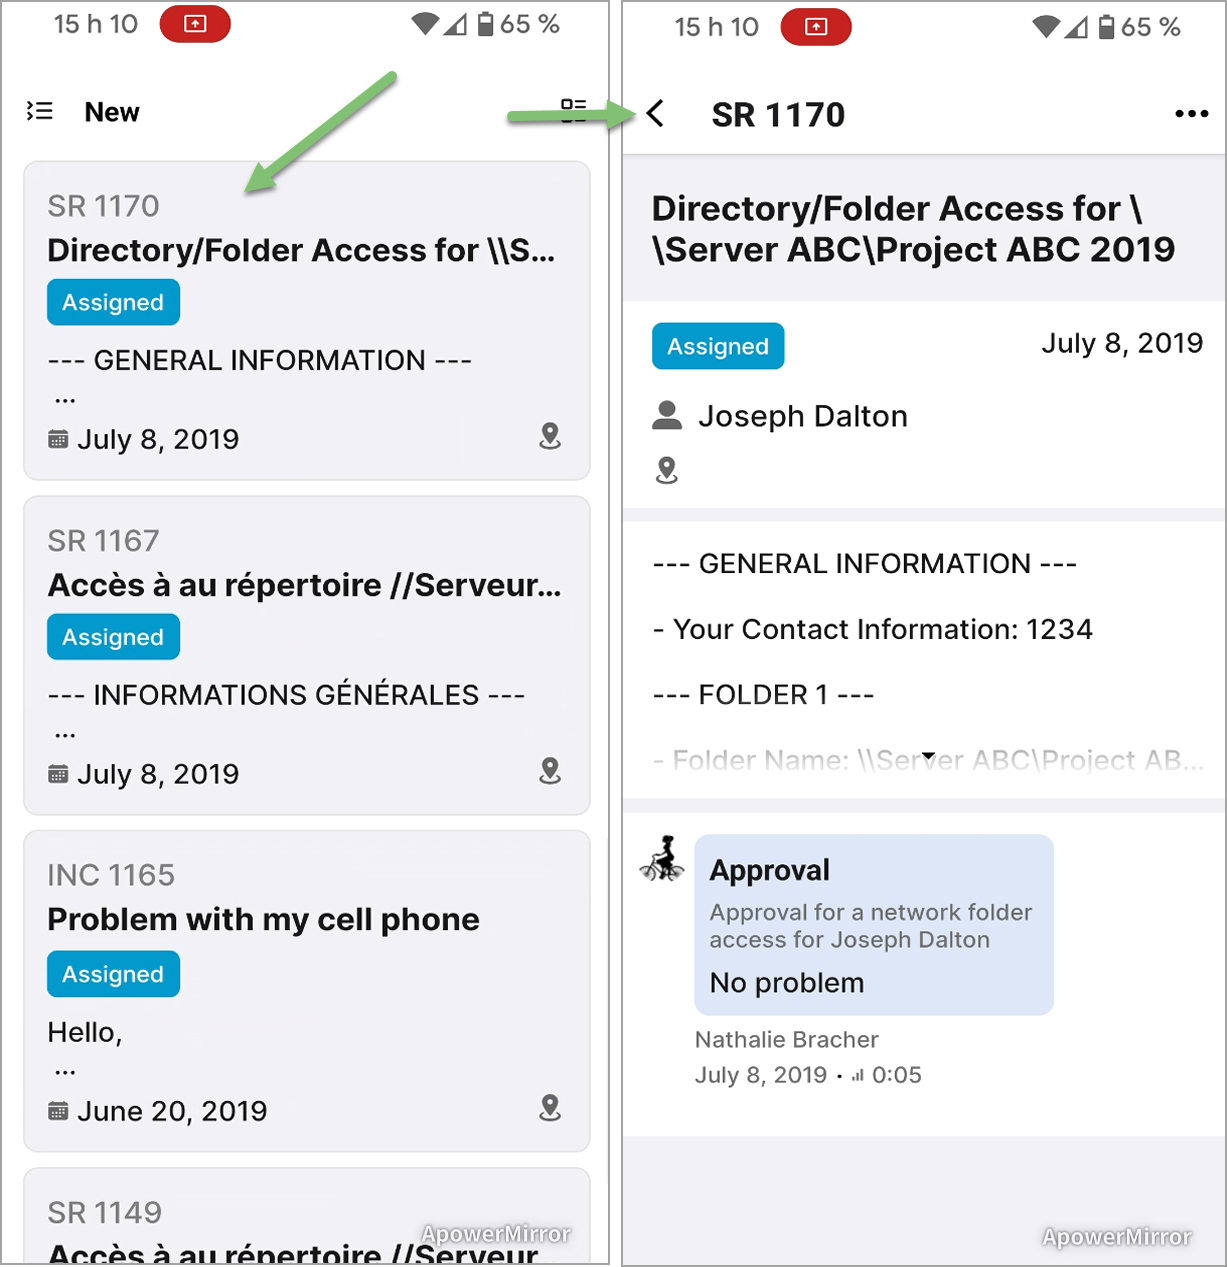
- Display the list of requests in condensed mode by pressing the button in the top right-hand corner.
Visual Explanation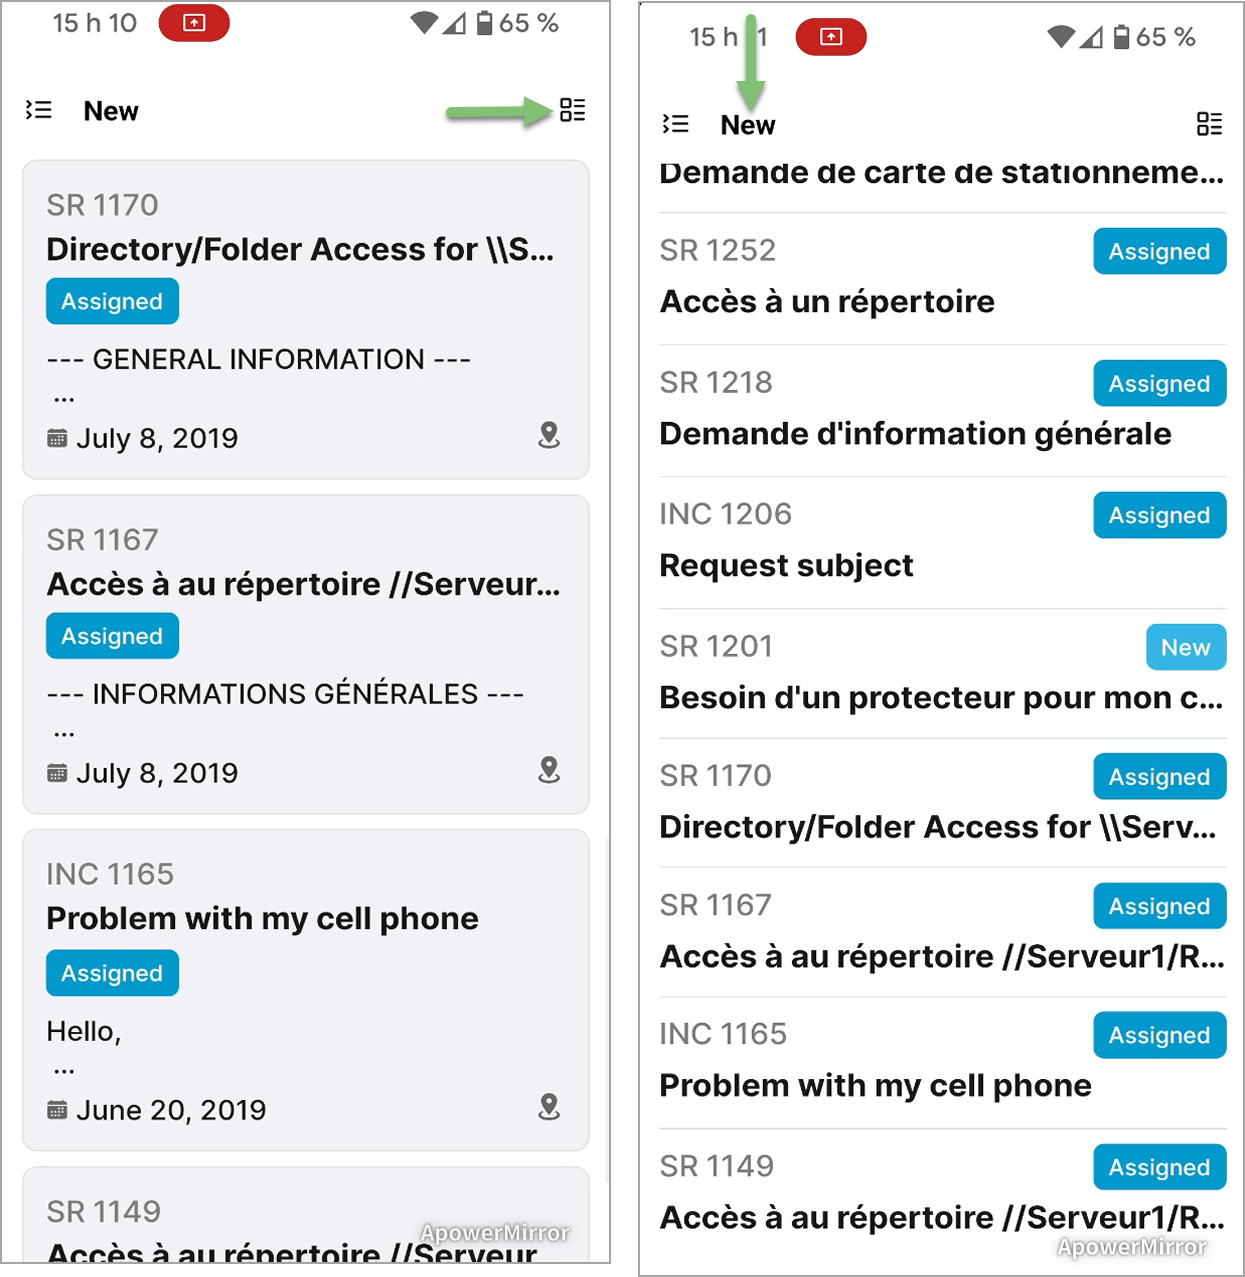
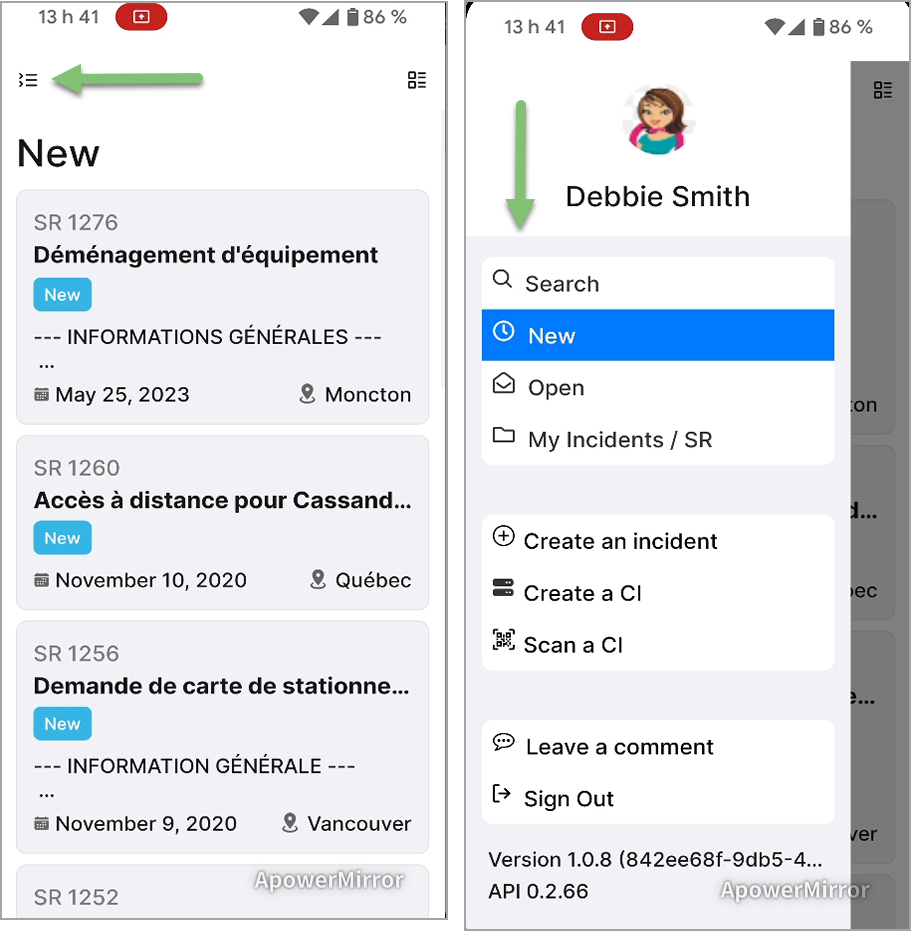
- Display the application's main menu by pressing the button at the top left.
Visual Explanation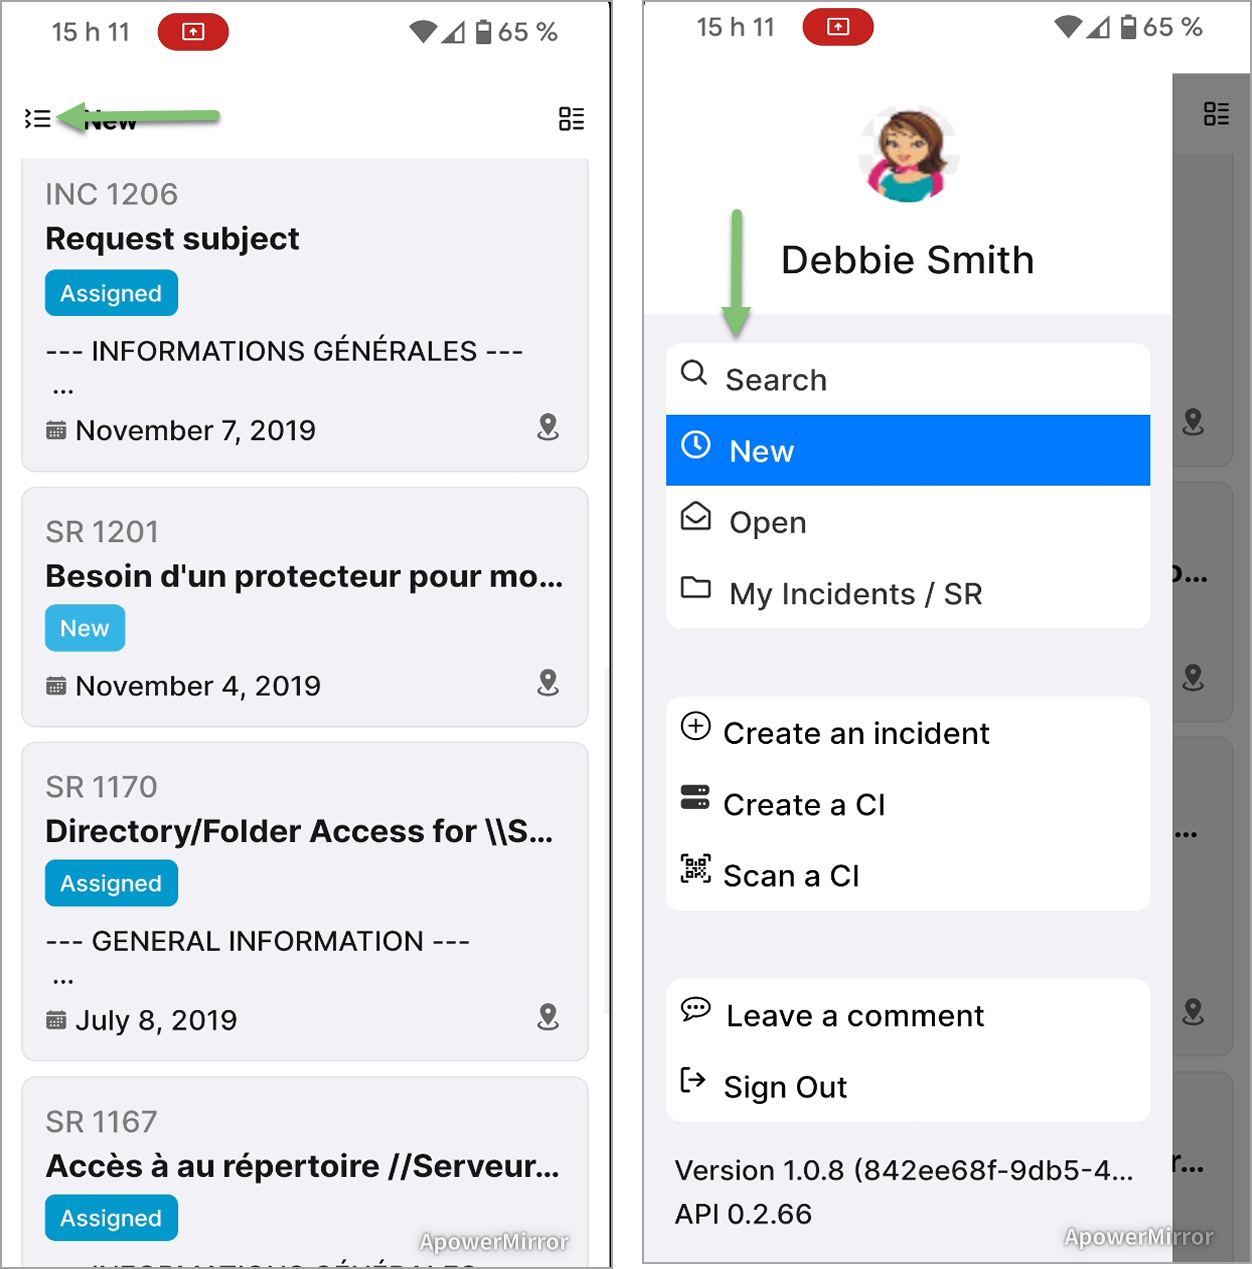
Requests
Details Displayed on a Request card
The request card displays the following information:
- Request type followed by number
- Subject
- Priority
- Status
- Requester's full name
- Description
- Date opened
- Site name
Information displayed in request details page
The request form displays the following information:
- Request type followed by number
- Menu of possible actions
- Subject
-
Priority
- Status
- Date opened
- Requester's full name
- CI(s) related to the request
- Site name
- Description
- Request attachments
- Activities
- Activity attachments
- View the requester’s profile
The following information will be displayed:
• Full name
• Job title
• Department
• Windows username
• Site
• Note
• CI
• Requests
Possible Actions From a Request
The following actions can be performed from a request:
-
Add Activity
- This action adds an activity to the request.
- You can adds Activity Type
Adding an activity benefits from activity type support to enrich the content of your work notes. Just like the note, the following options are inherited from the activity type:
• Public
• Send by Email - Teamwork Mode
Just like in the Windows client application, the mobile app also allows you to create activities in Teamwork Mode. The user will be prompted to select one or more assignees, and an activity will be added under each of their names.
-
Take assignment
- This action allows you to take charge of the request.
-
Assign Request
- This action allows you to assign a request to a group or assignee.
-
Categorize Request
- This action allows you to categorize an Incident request to use the Category and Subcategory fields.
-
Prioritize the Request
- This action identifies the priority of the request.
-
Link a CI / Link another CI
- This action allows you to add or modify the CI in cause of an incident.
- From the incident details page, an Unlink the CI button allows you to remove the CI in cause from the incident.
-
Mark a Request Pending
- The status of the request is set to Pending with the reason for the hold, and a hold activity is added with the note if applicable.
-
Suspend the Request
- The status of the request is set to Suspended with the reason for the suspension, and a suspension activity is added with the note if applicable.
-
Resolve a Request
- In the case of an Incident, validate or enter a value for Category and Subcategory.
- Request status is set to Resolved with resolution activity.
-
Cancel Action
- This action allows you to return to the previous screen without having selected an action.
- CAUTION this action does not cancel the request.
CI
Details Displayed on a CI Card
The CI card displays the following information:
- CI name
- CI type
Information Displayed in CI Details Page
The CI form displays the following information:
- Photo
- Name
- CI type
- Status
- Site
- Warranty expiry date
- Inventory number
- Serial number
- Note
- Link to service contracts
- Link to request history
- Linked CIs
- Attached files
-
Viewing and editing attributes
Possible Actions From a CI Details Page
The following actions can be performed from a CI:
- From a clickable link
-
See Service Contracts
- This action allows you to view the service contracts associated with the CI.
- The service contract card displays the following information:
- Number
- Type of contract
- Period (contract start and end dates)
- Supplier
-
See the Requests
- This action displays the CI's request history.
- Requests in the list are displayed in card mode.
-
- From the menu
-
Create an Incident
- This action is used to create a request of type Incident linked to the CI.
-
Edit the CI
- This action allows you to edit the CI.
- The following field can be modified:
- Name
- Inventory number
- Serial number
- Site
- Local
- Department
- Manufacturer
- Status
- Criticality
- Warranty type
- Date of purchase
- Note
- Main contact
-
Assign a photo
- This action allows you to assign a photo to the CI.
-
Cancel
- This action allows you to return to the previous screen without having selected an action.
-
Main Menu
The main menu of the mobile application is available from the button at the top left.
The functions available from the main menu are:
-
Favorites
- You can view your favorites in one place. The Favorites list allows you to view items marked from the following types:
- Request
- User
- CI
-
With a single click on the “Star” icon, you can add or remove an item from your favorites list.
-
Search
- The mobile application lets you search for a request or a CI.
- For a request, the search is performed on the following fields:
- Requester / User
- Subject
- Request number
- Request description
- For a CI, the search is performed on the following fields:
- Name
- Inventory number
- Serial number
- Service Contracts
- From a CI record, the Supplier section displays information related to service contracts. The supplier record is also available for viewing.
-
Request lists
- The main menu offers three different lists for viewing request:
-
New
-
Open
-
My Incidents / SR
- List of requests assigned to the user connected to the mobile application.
-
-
Group incidents / SR by site
-
A configurable option within the list allows you to group queries by top-level site by clicking on the gear icon located at the top right of the page.
-
This option is not enabled by default.
-
- The main menu offers three different lists for viewing request:
-
My Tasks
-
Users can view all tasks assigned to them from the new My Tasks list.
-
Available actions:
-
Add activity
-
Mark as Completed
-
-
-
-
Create an Incident
- This action is used to create a request of type Incident.
-
Create a CI
- This action allows you to create a CI.
-
Scan a CI
- The mobile application lets you search for a CI by scanning a barcode or QR code.
- The code must match one of the following CI fields:
- Name
- Inventory number
- Serial number
- When the application finds a match, it displays the CI card. If not, a CI not found message will be displayed on the screen.
-
When no results are found after scanning to identify a CI, the user is prompted to Create CI or Scan Again. When the option to create a CI is selected, the CI name is pre-filled based on the scanned value.
-
Leave a comment
- You can share your suggestions with us or propose an idea to improve the application simply by selecting the Leave a comment option in the main menu.
-
Sign Out
- This option disconnects the user from the mobile application session. They will then have to log in again using a QR code generated by the Octopus application.
Thank you, your message has been sent.