Table of contents
Related Articles
- How to Reset a User's Web Password
- Web Portal Authentication Modes
- Home Page Customization
- Securing Access to the Self‑Service Web Application Using an IP Address Range
- URL Parameters for Web Portal Pages
- Web Portal Tech for Mobile Technicians
- Template Restriction
Introduction
With Octopus, it is possible to use a Web portal for your users and completely eliminate the management of service requests via email. It not only allows users to submit their requests (incidents and service requests), but also to track the progress of their requests, add comments directly within the service request, and receive messages from the handling team.
The Web portal is the key element to ensuring optimal service delivery.
Web Portal for Different Services (ESM)
Octopus is a tool dedicated to service management and aligns with Enterprise Service Management (ESM) practices. It allows teams to better organize their work while offering a single Web portal available to all employees of the organization. The portal serves as the central place for submitting service requests to any entity within the company.
The starting point is the deployment of the Octopus database in your organization. From there, it is possible to activate multiple teams, with no limit on the number.
Once logged into the Web portal, the user simply needs to choose the team for which they want to submit a service request.

Once selected, the requests will be assigned to the appropriate responsible team.
Each team operates independently from the others. They are therefore autonomous, both in terms of feature configuration and request management.
List of Requests
If your environment contains more than one team accessible through the Web, you will see your requests grouped by their team name.
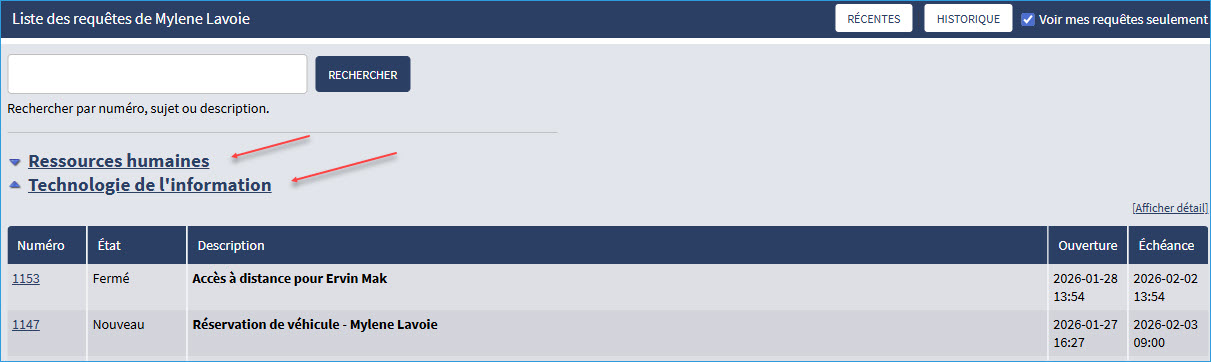
To ensure smoother navigation, the request list displays the 500 most recent requests across all teams, while the history section displays the 100 most recent requests.
Setup
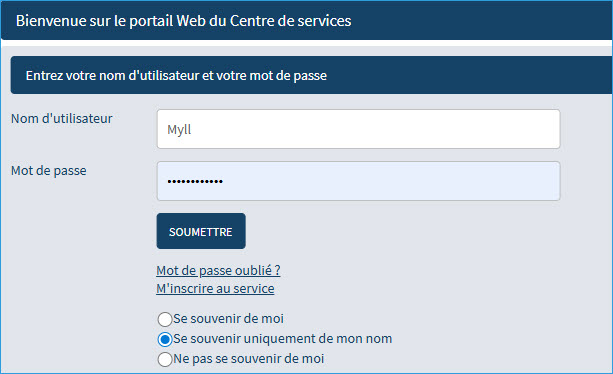
To find the address of your Web portal, select Launch Web Portal from the Tools menu in Octopus. The default authentication mode requires a username and a password. The username is linked to the Windows Username field in the user record, and the password is normally the same one you use to log into your company’s environment. If this password does not work, you can click Forgot your password? in the login window. For all available authentication modes, refer to the article Web Portal Authentication Mode.
Please note: The behavior may vary depending on the authentication mode configured by the Octopus database administrators.
Steps to Access the Web Portal
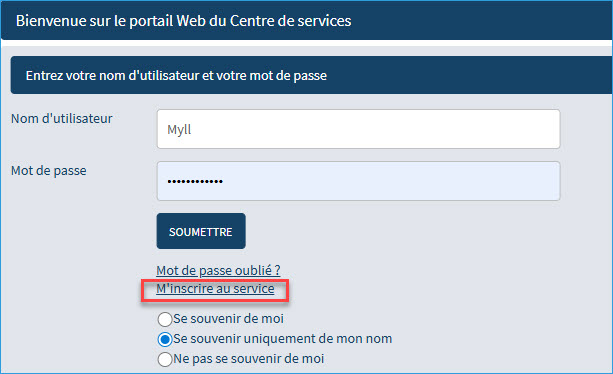
- From the Web portal home page, enter your Username and Password:
Invalid Username or Password
- If you enter an invalid username or password, the system will display an error message.
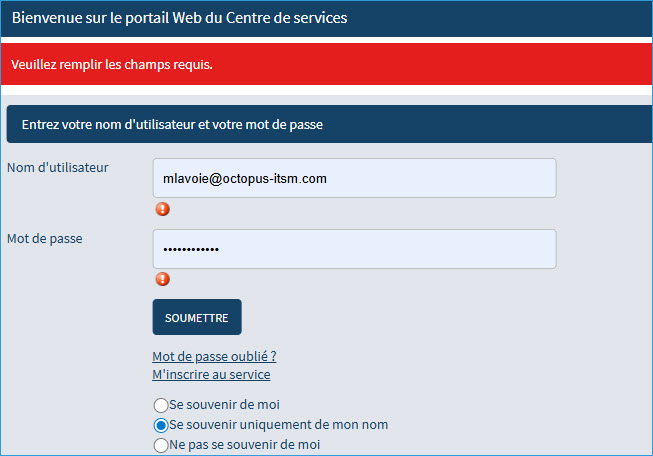
- PLEASE NOTE: To log into the Web portal, you must know your username. Generally, your username is the same as your Windows username. If not, you must contact the IT service desk to obtain your Octopus username.
- In the previous window, the one showing the login error, click Forgot your password?, enter your username, and click Submit.


- The account must already have been created in order to reset the password.
- If the specified username exists, the system will send you an email within a few minutes to initialize your Password. Please check your junk mail folder, as the email may be filtered there.
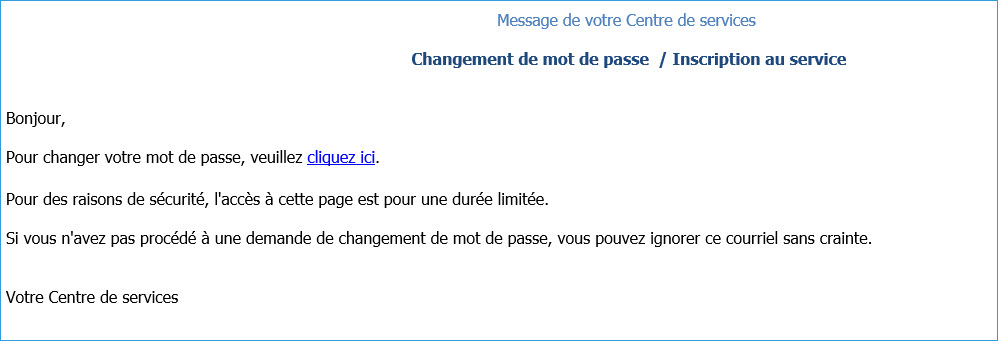
- Click the link in the email to reset your password.
- By clicking Submit, you can now log in to the Web portal using your new password.
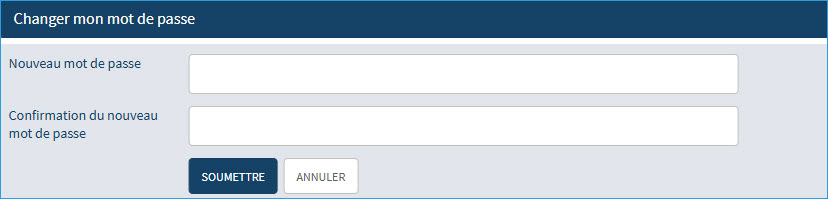
- You can change your password at any time, either through the Web portal under My Profile or in the Octopus Windows application under File > Change my password.
User Account Creation Option for External Users (opening the Web portal to external users)
- By default, a user must already exist in Octopus to be able to access the Web portal. However, in some environments—such as municipalities wishing to open the Octopus portal to citizens—it is possible to activate a Register for this service plugin.
- Once the plugin has been installed by the Octopus Service Desk, the Register for this service button becomes functional and allows people external to the organization to create requests on the Octopus Web portal. Note that external users will ideally have access to specific forms tailored to their needs.
- We invite you to consult the following article to learn more about this feature: Register to this service
Once the option is enabled, the required fields for user registration are:
- First name
- Last name
- Email (The email will be added to both the Email and Windows Username fields)
- Password
- Password confirmation
This option works only with the Username and Password login mode and must be activated through the Octopus Service Desk.
Contact our Service Desk to request a configuration change and enable this option.
* Please specify the names of the additional questions (fields) and the desired options. See the following article: Register to this service
My Profile
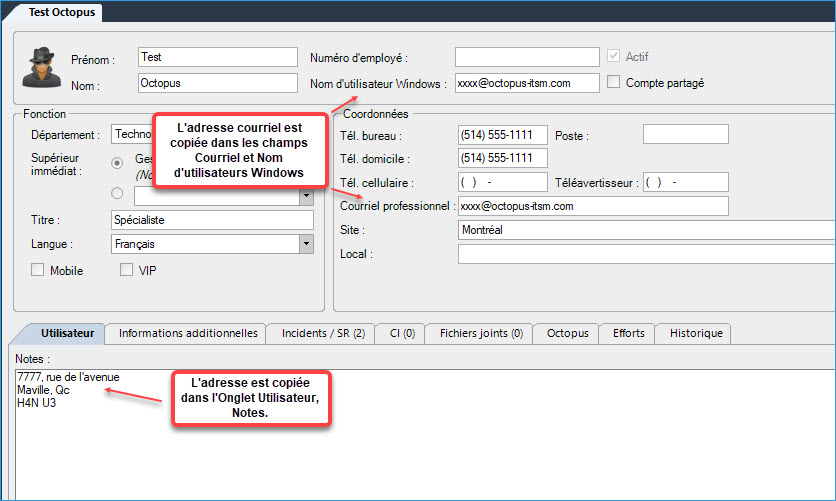
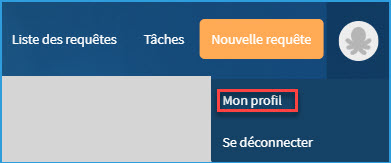
From the main page of the Web portal, click the My Profile button to view or modify the information in your user record.
The visible information comes from the user record. By default, the following fields are displayed:
|
* The Site field is visible by default, but it can be hidden |
Additional fields may be added to the list of visible information.
Contact us to modify field visibility if needed.
In this case, you will only be able to use the Change my password, Unavailability, and Delegate my approvals to options, if applicable.
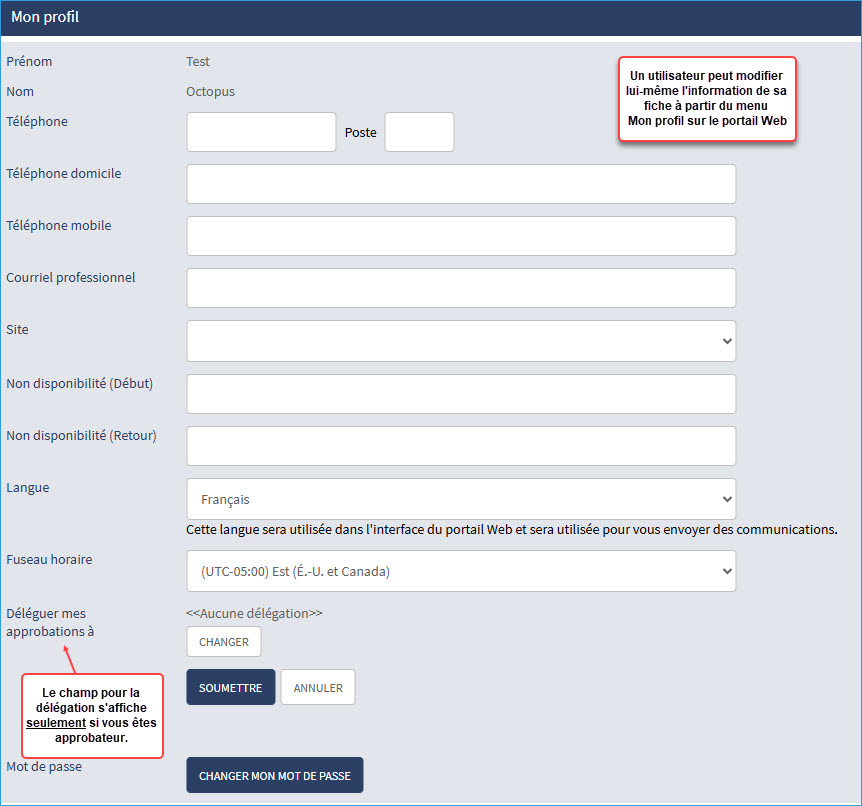
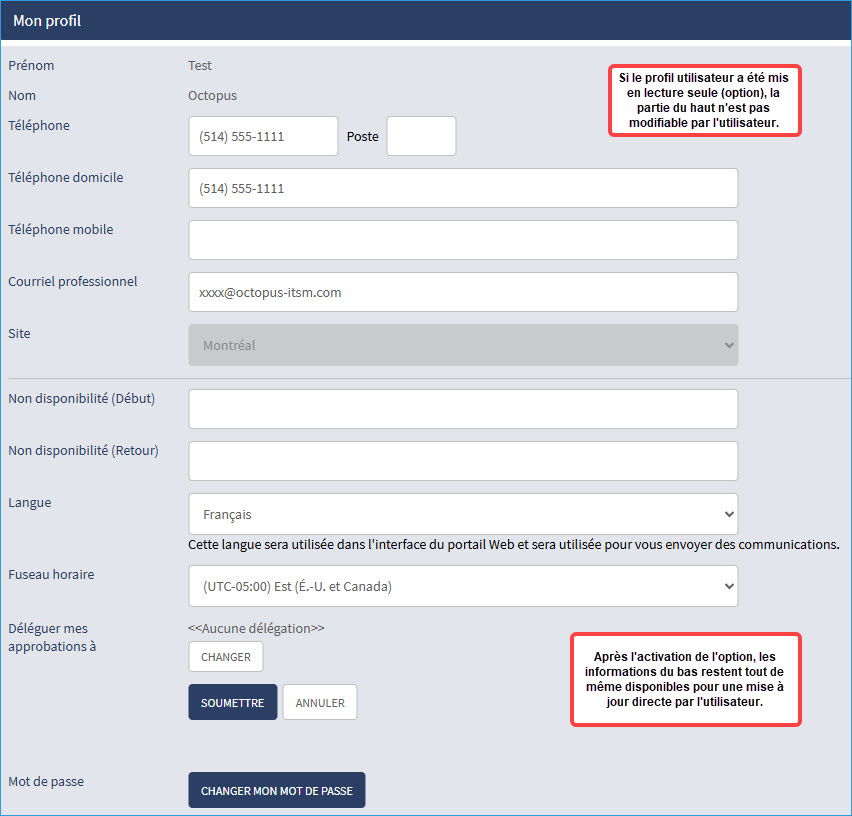
Enabling/Disabling Profile Editing
It is possible to set the profile to read‑only or allow users to modify it. To change this option, you can contact us by submitting a request through our Web portal. For more details on this feature, consult User Profile Modification on the Web Portal
Please note that if user synchronization is performed with an external source, we strongly recommend setting the profile to read‑only (enabling the option), since any changes made by the user will be overwritten during the next synchronization.
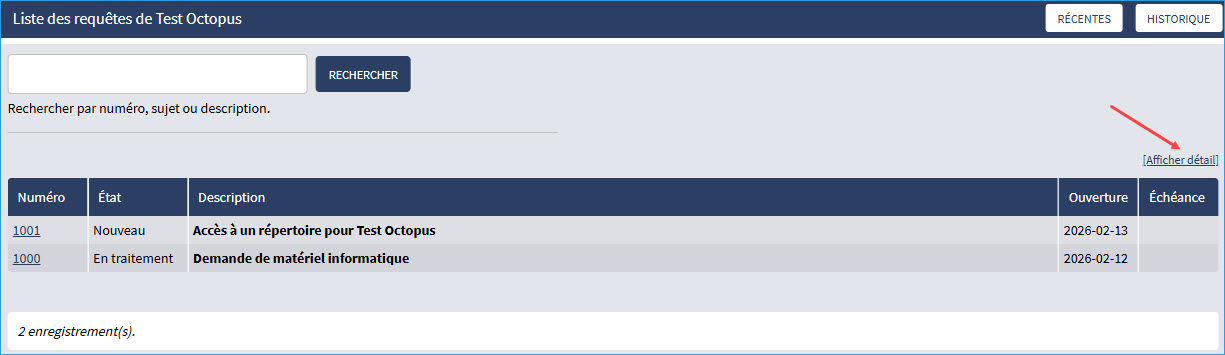
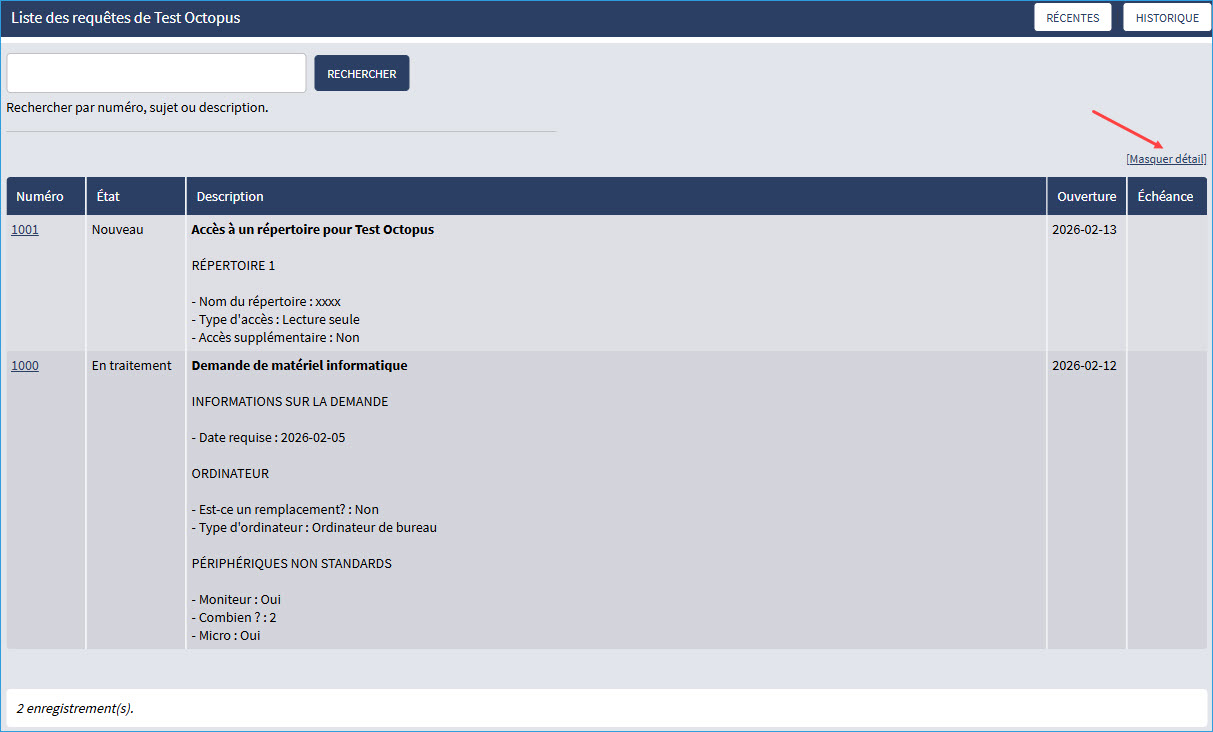
List of Requests
When opening the Web portal, you have access to the list of requests you have already submitted to a team. By default, the list is displayed without details, providing a quick overview of ongoing requests.
You can click the [Show details] link to view a more detailed list.
Recent and History Buttons
- The Recent link displays active and closed requests. Please note that, by default, closed requests are displayed for 30 days after the closing date (max. 500 most recent requests).
- The History link displays all requests (max. 100 requests).

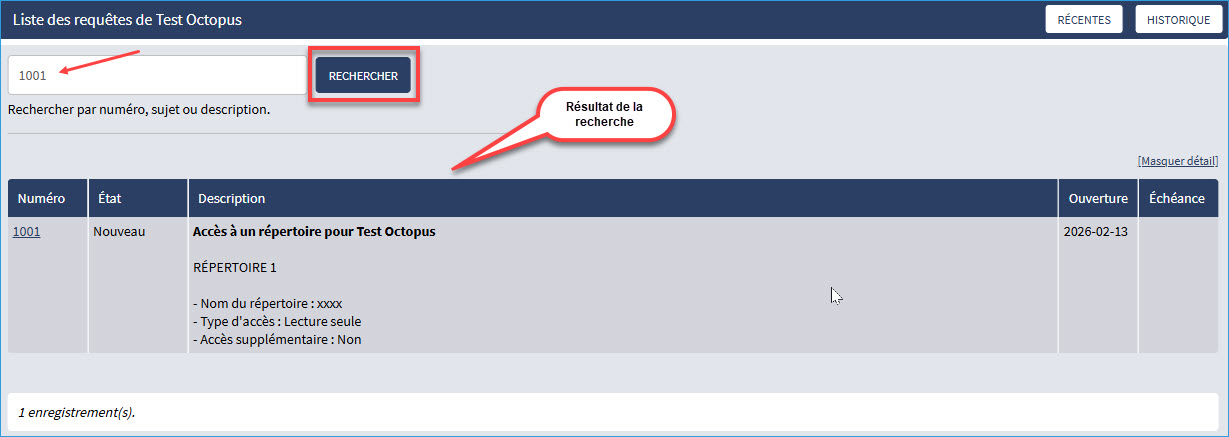
Search
You can search among open requests or within the history for a specific request.
To perform a search, enter the information (number, subject, or description) in the designated field and click the Search button.
The search is performed in the following fields:
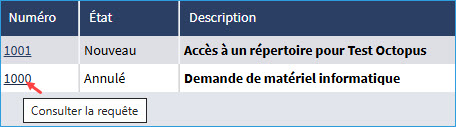
Visibility of Canceled Requests
By default, requests that have been canceled are not visible on the Web portal. This behavior can be modified from the menu Tools > Options > Visibility of canceled requests via the Web portal.
To modify these options in Octopus, a user must have the following permission:
- Administer Octopus


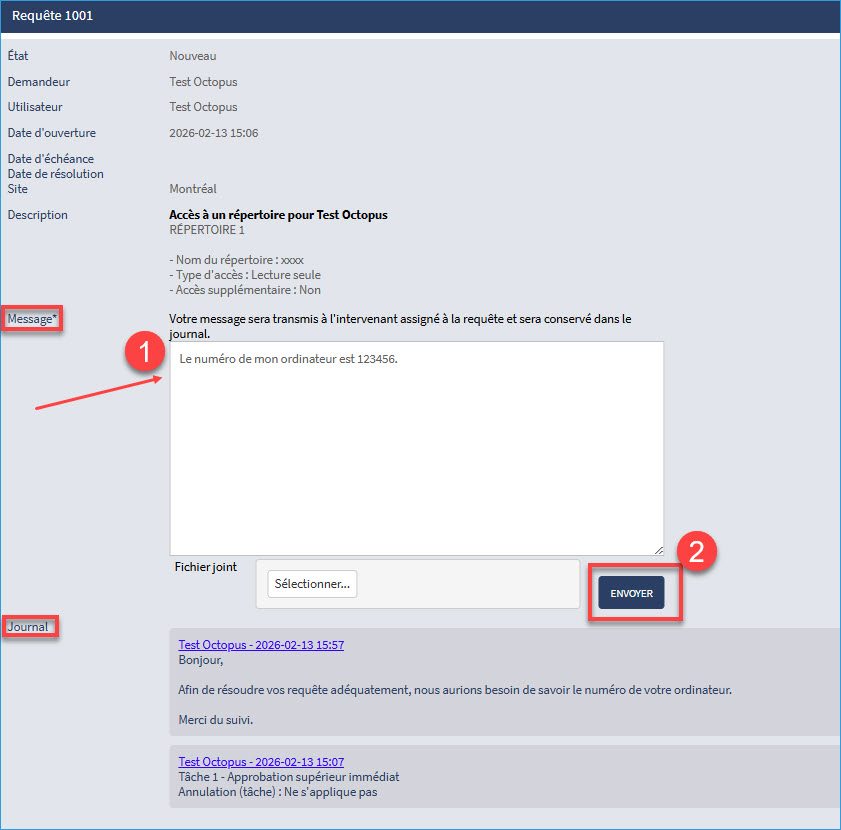
Journal Entry (Communicate information directly within the request)
From the list of your requests, you can add information to the activity log. This information will be sent to the technician or group responsible for your request.
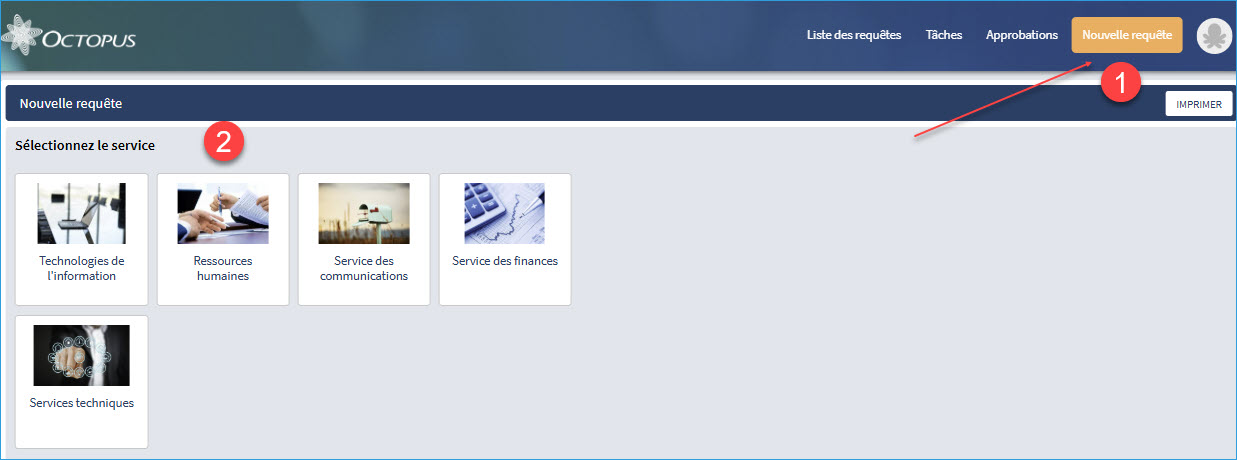
New Request
To create a new request, click the New Request link (orange button) and select the team. Then, choose the appropriate request type according to the category defined for each team.
Web Form
Depending on the request type, a form is usually configured to collect as much relevant information as possible to efficiently process the request.
These forms may contain a wide variety of field types such as text, dropdown lists, linked lists, checkboxes, dates, CI, reservations, etc.
Fields marked with an asterisk (*) are required fields. If a field is marked “required,” you will not be able to submit your request without providing an answer.
When a request is submitted, a number is assigned to it and the request will appear in the List of Requests tab.
Example of a form:

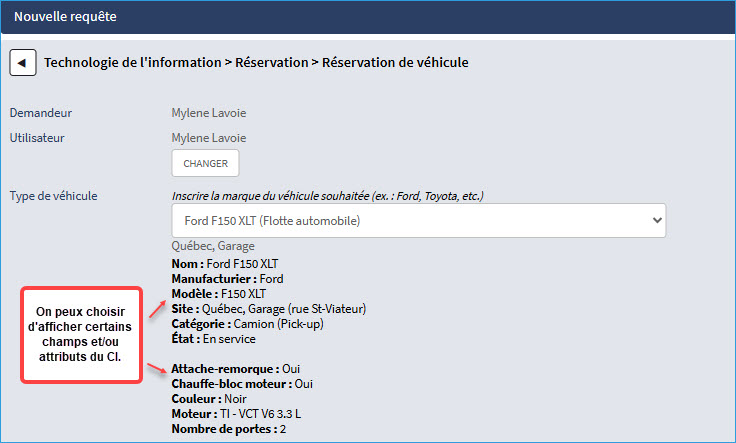
Search and Link Equipment
In some forms, there is a “CI” field type that allows you to search for a specific piece of equipment.
You must follow the search instructions, meaning select “Search” and click the magnifying glass to search for the equipment related to the request.
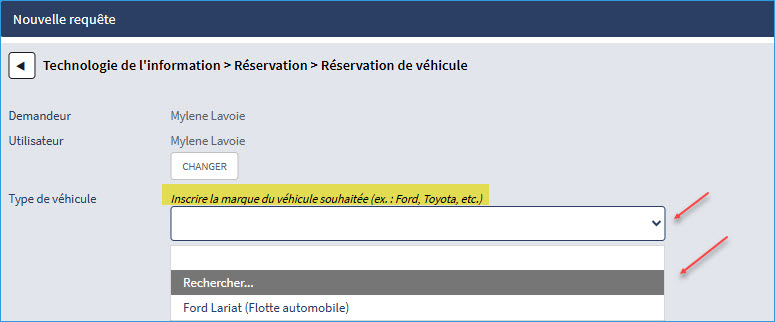
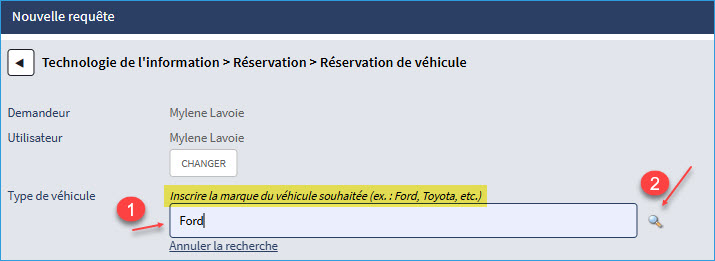
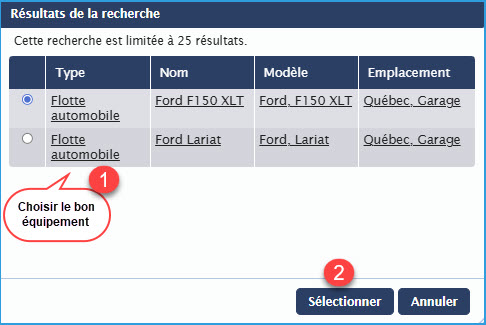
Here is how CI search is performed:
Basic search:
- Default number of search results: 5 results.
- If needed: the number of results can be increased (10, 25, 50, 100). To enable this feature, you must submit a request to our Service Desk.
The search is based on the following fields:
- Name
- Serial number
- Inventory number
* Retired CIs are always excluded from the search. *
How Attachments Work
There are different ways to add an attachment. Please refer to the following article for more information on Working with attached files.

Thank you, your message has been sent.