Table of contents
Related Articles
Create customized forms in Octopus
Introduction
The subject of a request is an important element, as it is often the basic information that is visible in a list.
By default, Octopus subjects take the name of the request, but there are two options that help to automatically get more specific subjects:
- The alternate subject
- Uses variables to create the request subject.
- The destination option of a text field
- Uses the value of a form field in the request subject.
To configure the alternate subject or the subject destination you need the permission to administer Octopus.
Adding custom variables from the request will make the form mandatory.
Alternate Subject
Octopus and Custom Variables: What's the Difference?
Octopus variables can come from a user's file; name, phone number, etc.
Just as they can be added as colums in lists, they can be used as variables.
Although you can add any Octopus field as a variable, those that will work in the subject are usually the ones that are under the Requester and User nodes.
Custom variables come from current the request form. We use these fields to retrieve the requester's answers and add it to the subject of the request.
The best field types to add to the alternate subject are text, radio buttons and combo boxes. The long text field type can be added, but since the subject's number of characters is limited, we do not recommend its use because it may be incomplete.
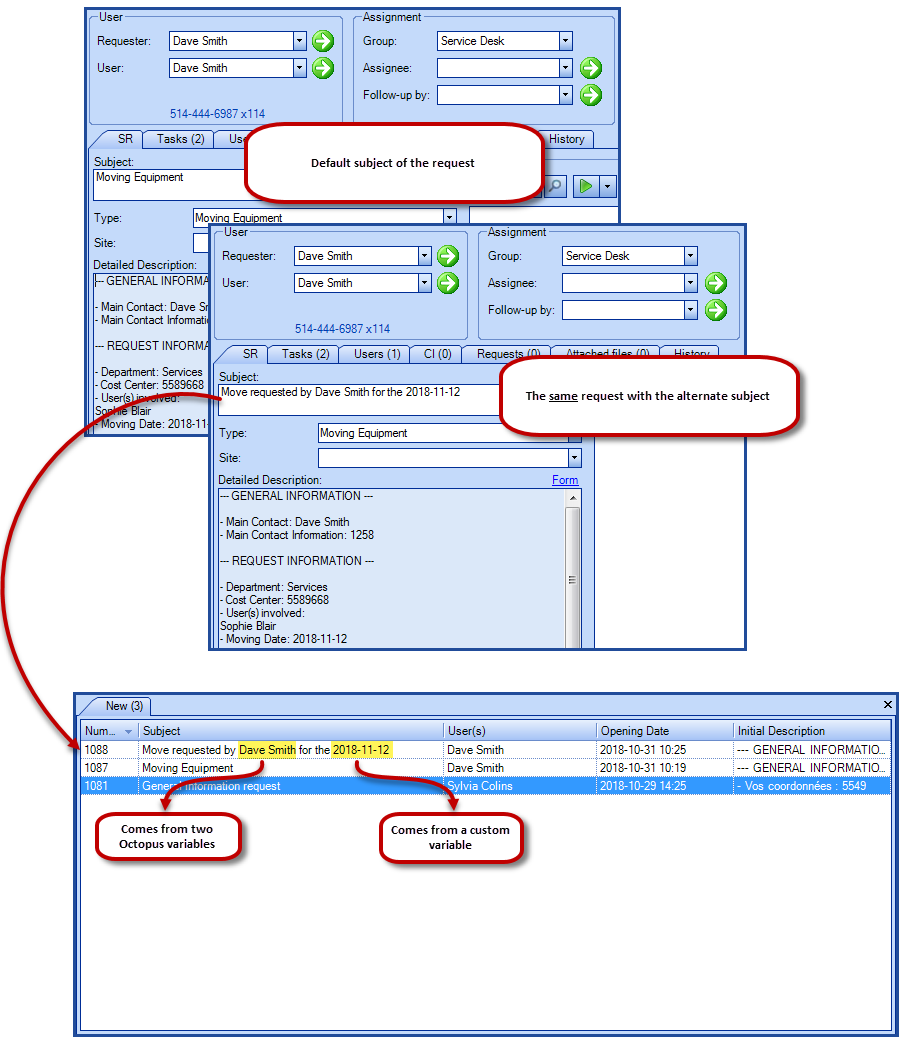
Alternate Subject Example
Here is an example of a moving request first with the default subject and then with an alternate subject. The alternate subject uses information contained in Octopus and in the request for further details.
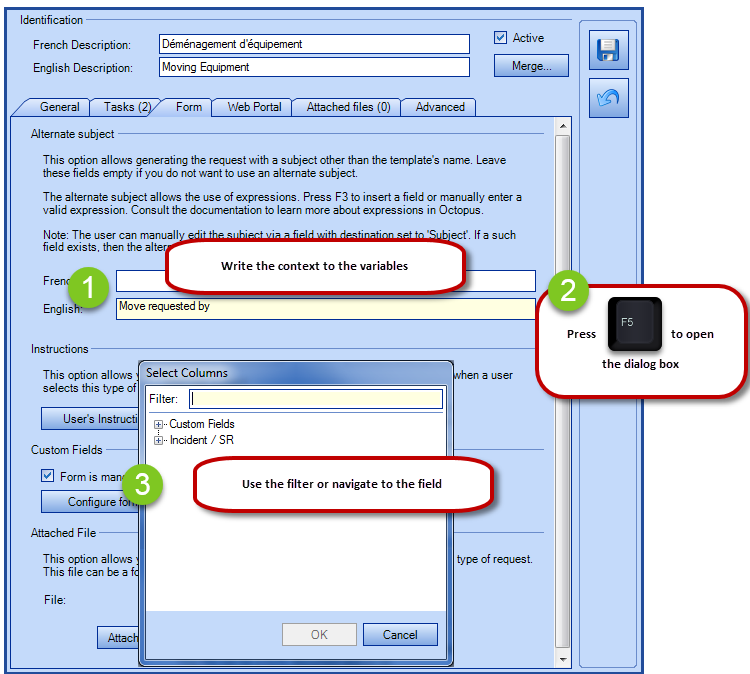
Alternate Subject Configuration
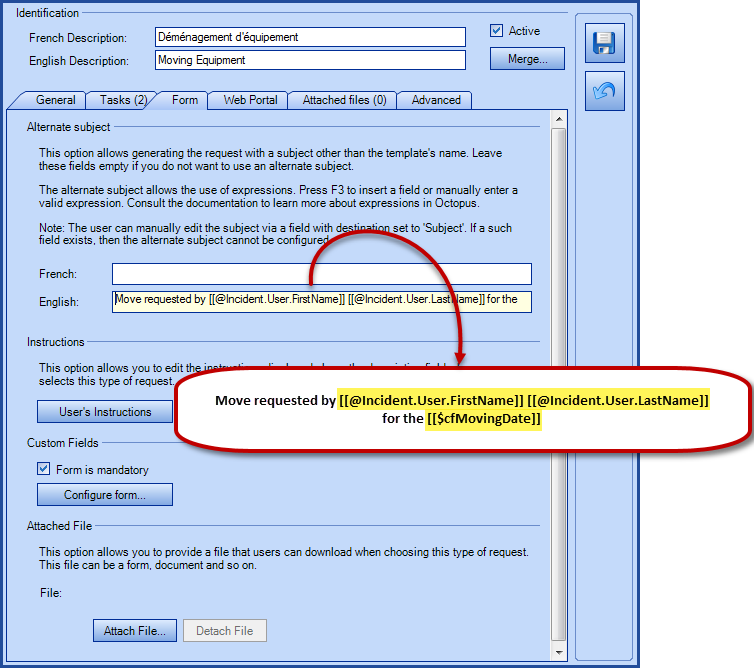
The configuration is done from the Tools > Reference data management menu. Select an SR type or incident template and go to the Alternate subject section of the Form tab.
Since the name of the variables can be long, the limit during the configuration of the alternate subject is sufficient not to block the addition of variables.
However the information contained in the subject remains limited to 500 characters when creating the request.
Write the context of the alternate subject and use the F3 key to add the Octopus or form variables.
In our example we have identified the user of the request and the date of the move.
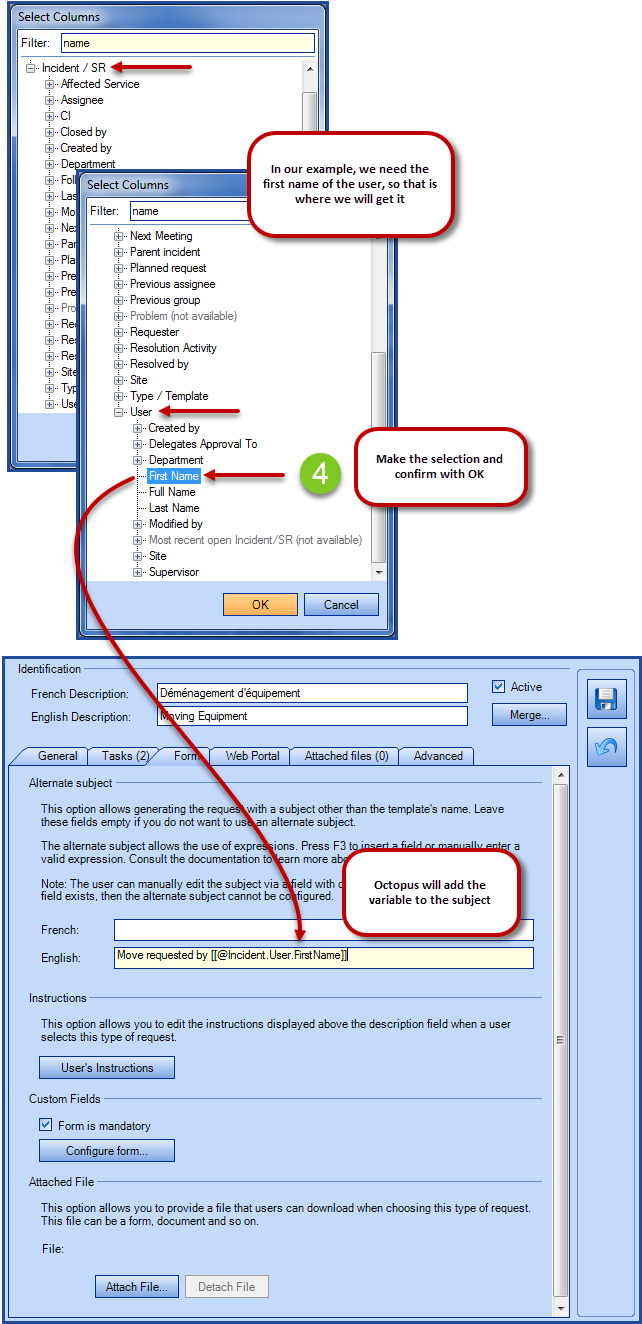
Here are the variables found with F3:
- In the Incident/SR node under User
- First Name
- Last Name
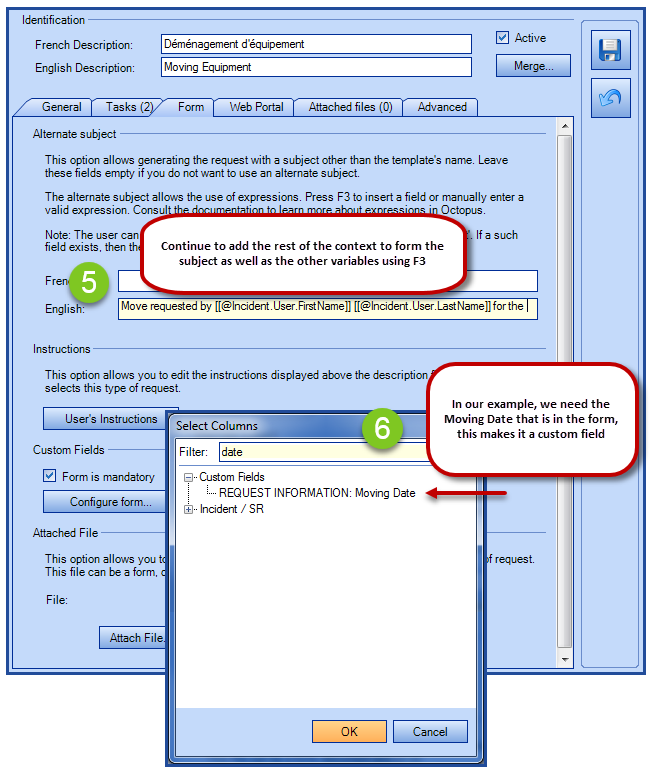
- In the Custom Fields node
- Moving Date
Subject Destination
It is possible to take a text field type from a form and add the information contained in this field to the request subject.
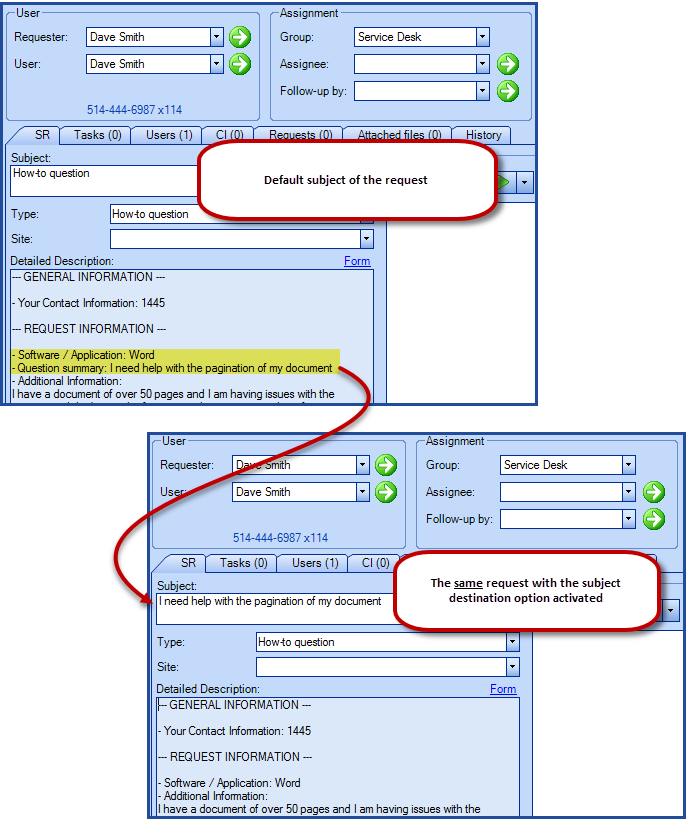
Example of the Subject Destination
In our example we added to the subject the summary of a question on a specific software. This allows to quickly see what it's about.
Subject Destination Configuration
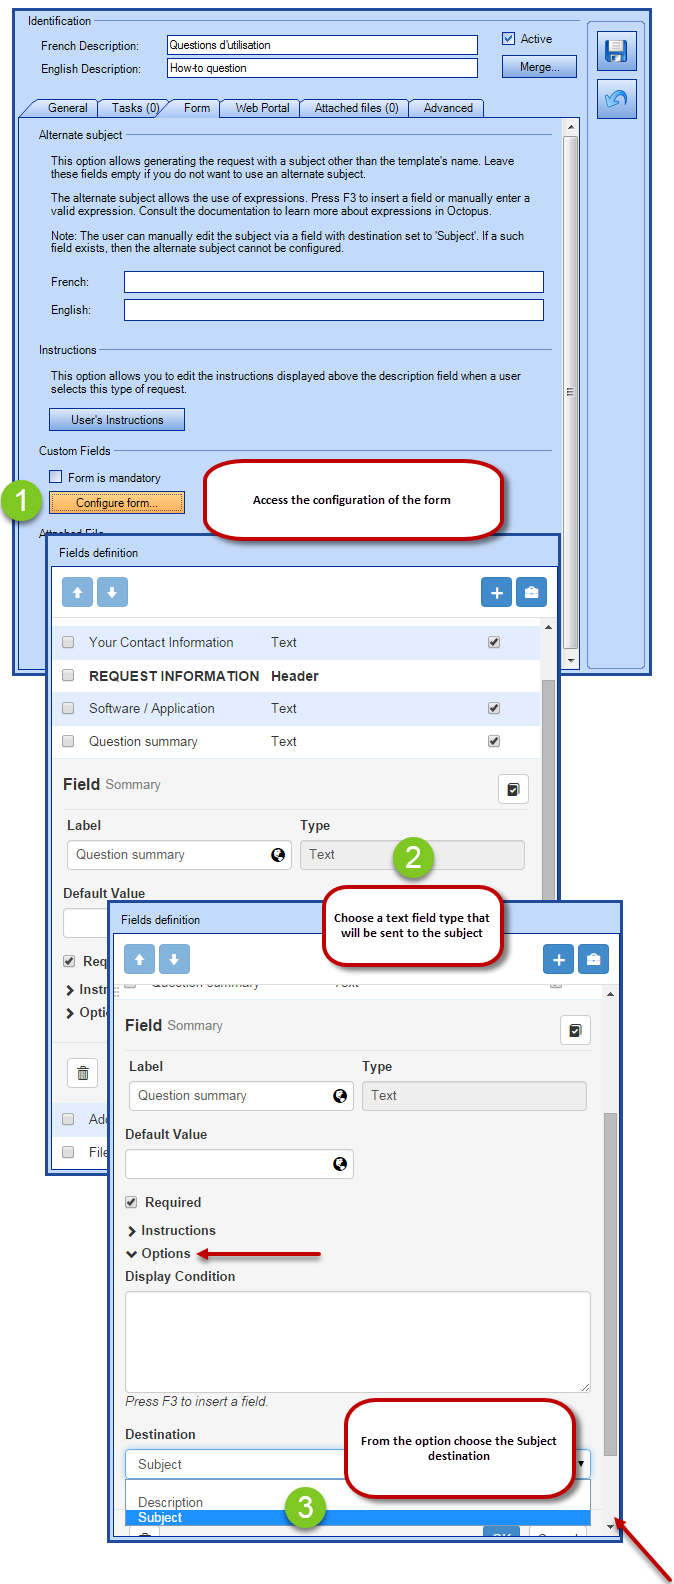
The configuration is done from the Tools > Reference data management menu. Choose an SR type or incident template and go to the Form tab.
Use the Configure form button and choose the text field to send the subject. And in the options of this field select the Subject destination.
 Trick:
We recommend using the subject destination for the "Any other problem" or "Any other request" requests to ensure that you always have a clearer subject in this type of very generic request.
Thank you, your message has been sent.